How To Tie A Tourniquet: A Simple Guide For Stopping Severe Bleeding
Knowing how to tie a tourniquet can, quite simply, save a life. When someone faces a very serious injury, where blood pours out quickly, every second truly counts. This skill, while it seems a bit intense, is something many people can learn. It helps you act fast when a sudden, dangerous bleeding situation happens.
If you find yourself in a scary emergency, perhaps where someone or even an animal is severely hurt and losing a lot of blood, your presence can make a huge difference. Approach the situation with calm and a sense of reassurance. This helps both you and the injured person. You are there to help, and that is a very good thing, you know.
Tourniquets, it's worth noting, can be put on whether the person is awake or not. The main idea is to stop the bleeding, and that goal stays the same. While it's best if trained first responders handle these things, sometimes you might be the only one around. So, learning a little bit about when and how to use one in a pinch is, in a way, very smart.
Table of Contents
- Understanding Severe Bleeding
- What is a Tourniquet and When Do You Need One?
- Approaching an Emergency Scene
- Steps to Properly Apply a Tourniquet
- Improvised Tourniquets: What to Use and How
- Important Things to Remember
- Frequently Asked Questions About Tourniquets
- Final Thoughts on Emergency Preparedness
Understanding Severe Bleeding
Serious bleeding means blood is coming out fast and steady from a wound. This kind of bleeding can cause a person to lose too much blood very quickly. It is a very serious problem that needs immediate action. You might see blood spurting or pooling rapidly around the injury. That, is that, a clear sign of a major issue.
The first thing you want to do, if you can, is discover where the blood is coming from. Pinpointing the source helps you know where to focus your efforts. A large cut, a deep puncture, or an injury that tears tissue can all lead to this kind of bleeding. Knowing this helps you understand the urgency of the situation, too.
Stopping this kind of blood loss quickly is the main goal. Without fast help, a person can go into shock or suffer other very bad health problems. So, acting without delay is pretty much essential. This is where knowing about tools like a tourniquet becomes incredibly helpful, you know.
What is a Tourniquet and When Do You Need One?
A tourniquet is a device used to stop blood flow to a limb. It works by applying strong pressure around an arm or a leg, squeezing the blood vessels shut. This cuts off the blood supply past the point where it's applied. It's really for situations where bleeding is so bad that direct pressure isn't enough, or when you cannot apply direct pressure effectively, perhaps because of the type of wound or the number of injured people.
You should consider using a tourniquet when there is a life-threatening bleed from an arm or a leg. This means the blood loss is very heavy and will not stop with simple pressure. If you see blood soaking through bandages, or if the bleeding is spurting, that's a sign it might be needed. It is a very powerful tool for a specific kind of problem.
Ideally, people trained in emergency first aid, like paramedics or doctors, should be the ones putting on tourniquets. They have the most experience. However, in an emergency, if you are the first person there, and someone is losing a lot of blood from a limb, knowing how to put one on could be the only way to keep them alive until professional help arrives. This is why learning when and how to use a tourniquet in an emergency is so important, actually.
Approaching an Emergency Scene
When you come across an emergency with severe bleeding, your first thought should be about safety. Make sure the area is safe for you to enter. You do not want to become another person needing help. Look for any immediate dangers, like traffic, fire, or unstable structures. Your safety comes first, obviously.
Once you know it's safe, approach the injured person with a sense of calm and reassurance. Your calm demeanor can help keep them from panicking, which is very helpful. Speak in a clear, steady voice. Tell them you are there to help. This can make a big difference, especially if they are conscious, and you know, feeling quite scared.
Then, quickly assess the situation. Find where the blood is coming from. Is it an arm or a leg? Is it gushing out? This quick check helps you decide if a tourniquet is the right tool to use. Remember, the goal is to stop severe, life-threatening bleeding. If it's just a small cut, a tourniquet is not what you need, more or less.
Steps to Properly Apply a Tourniquet
Applying a tourniquet properly is key to its effectiveness. There are specific steps to follow to make sure it works as it should. This isn't just about tying a knot, it's about applying very strong pressure to stop the flow of blood. So, let's go through the steps for how to tie a tourniquet effectively.
Step 1: Get Ready
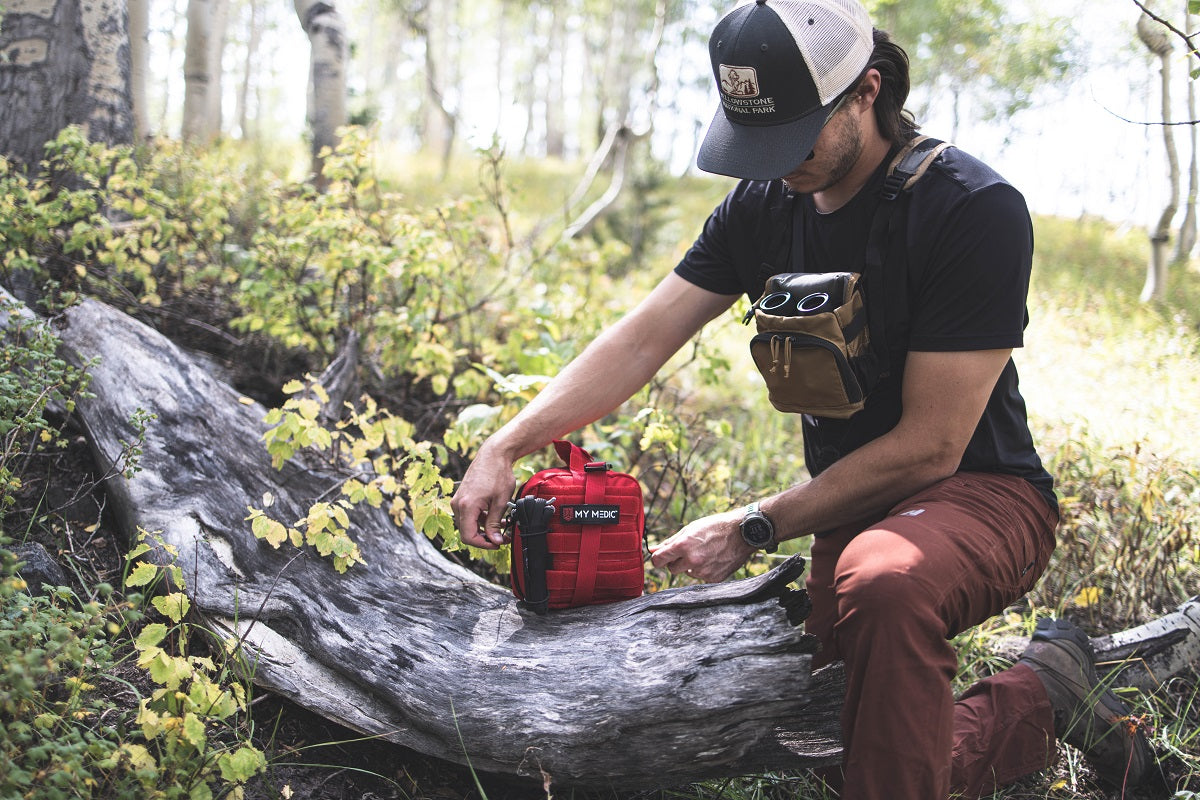
First, get your tourniquet. A commercial tourniquet, like a Combat Application Tourniquet (CAT) or a SOF Tactical Tourniquet, is best. These are made for this exact purpose and are very reliable. If you do not have one of these, you might need to improvise, which we will talk about a little later. Having the right tool ready saves precious time, actually.
Make sure the injured limb is exposed. Push up sleeves or pant legs, or cut clothing away if you need to. You need to place the tourniquet directly on the skin, if at all possible. This helps it grip better and apply pressure more effectively. So, clear the area around the wound, you know.
Tell the person what you are doing. Even if they are unconscious, speaking calmly can help. If they are awake, explain that this will hurt, but it is necessary to save their life. This prepares them for the pain that will come when you tighten the device, which is important for them to understand, more or less.
Step 2: Place the Tourniquet
Place the tourniquet high up on the limb, between the injury and the body. This means if the wound is on the lower arm, put the tourniquet on the upper arm. If it's on the lower leg, put it on the upper leg. It should be at least two to three inches above the wound, but never over a joint like the elbow or knee. That, is that, a critical point.
The tourniquet needs to be placed on the fleshy part of the limb, not directly over a bone if you can help it. This allows for better compression of the arteries. You want to wrap the strap tightly around the limb, pulling it snug. Make sure there is no slack at all. It should feel quite tight even before you start twisting, you know.
Some commercial tourniquets have a self-adhering band. You feed the strap through a buckle and pull it as tight as you possibly can. This initial tightness is very important for the next step. It's almost like you are trying to make it as tight as a belt, but even more so, apparently.
Step 3: Tighten the Device
Now, this is where the magic happens, so to speak. Most commercial tourniquets have a windlass rod. This is a stick-like part that you twist. Twist the windlass until the bleeding stops completely. This might take several turns, and it will cause significant pain to the injured person. This pain is a sign that it is working, actually.
As you twist, you will see the bleeding slow down and then hopefully stop. The limb below the tourniquet might change color, becoming pale or bluish. This is also a sign that blood flow has been cut off. Keep twisting until the blood flow is totally gone. If you can still see blood, you need to twist more, you know.
Once the bleeding stops, do not loosen the tourniquet. It needs to stay tight until medical professionals take over. Loosening it, even for a moment, can cause more blood loss and be very dangerous. It's a bit like closing a faucet; once it's off, you keep it off, more or less.
Step 4: Secure and Note the Time
After the bleeding has stopped, secure the windlass rod. Commercial tourniquets have a clip or a holder for this. Make sure the rod is firmly in place so it cannot unwind. If it unwinds, the pressure will release, and the bleeding will start again. That, is that, something you definitely want to avoid.
It is incredibly important to note the time you applied the tourniquet. Write it directly on the tourniquet itself if there is a place for it, or on the person's forehead with a marker if you have one. This information is very helpful for medical staff. They need to know how long blood flow has been restricted, you know.
Stay with the injured person and keep them calm until help arrives. Continue to monitor the wound to ensure the bleeding does not restart. If it does, you might need to tighten the tourniquet a little more. Your presence and continued care are, in some respects, just as vital as the tourniquet itself.
Improvised Tourniquets: What to Use and How
Sometimes, you might not have a proper commercial tourniquet. In these urgent situations, you can make an improvised one. This is not ideal, but it can still save a life. You will need two main things: a wide, strong material for the band, and a sturdy stick-like object for the windlass. A bit like making something out of nothing, really.
For the band, think about materials like a scarf, a sturdy piece of cloth, a belt, or even a strong bandana. It needs to be at least one to two inches wide. Do not use thin materials like string or wire, as these can cause more damage to the limb. The wider the material, the better it distributes pressure, apparently.
For the windlass, look for a stick, a pen, a small wrench, or anything strong enough to twist without breaking. You will wrap the band tightly around the limb, just like with a commercial tourniquet. Tie a simple knot to secure the ends, leaving a loop. Then, insert your stick-like object into this loop. This is your windlass, you know.
Twist the stick until the bleeding stops. Once it stops, you need to secure the stick so it does not unwind. You can tie another knot over the stick, or use tape, or even another piece of cloth to hold it in place. Remember to note the time of application, just as you would with a commercial tourniquet. It's almost the same process, just with different materials, actually.
Important Things to Remember
Using a tourniquet is a serious measure. It is not something to do lightly. While it can save a life, it also carries risks. Understanding these risks and knowing what to do next is very important. So, let's talk about some key things to keep in mind after you have applied a tourniquet, anyway.
Seeking Professional Help
After you apply a tourniquet, your next immediate step is to call for professional medical help. Dial your emergency number right away. Tell them exactly what happened, where you are, and that you have applied a tourniquet. This information helps them prepare and respond quickly, which is very helpful.
Do not remove the tourniquet once it is applied. Only trained medical professionals should do this. They have the knowledge and equipment to manage the reperfusion injury that can happen when blood flow is restored. Your job is to keep the tourniquet on and wait for help to arrive. That, is that, the most important rule.
Stay with the injured person and continue to reassure them. Keep them warm and comfortable as much as possible. Your presence can be a source of strength for them during a very difficult time. It's a bit like being a steady anchor in a storm, you know.
Common Mistakes to Avoid
One common mistake is not applying the tourniquet tight enough. If the bleeding does not stop, it is not tight enough. You need to twist it until the blood flow completely stops. Partial pressure can actually make things worse by blocking veins but not arteries, which increases bleeding. So, go for full tightness, you know.
Another mistake is placing it over a joint. Joints are not good places for tourniquets because the bones and tendons there prevent proper compression of the arteries. Always place it on the fleshy part of the limb, a few inches above the wound. This is a very common error people make, apparently.
Also, do not cover the tourniquet with clothing or bandages. It needs to be visible so that arriving medical personnel can easily see it. This helps them quickly assess the situation and take over care. Keeping it visible is, in some respects, just as important as putting it on correctly, you know.
Training Makes a Difference
While this guide gives you a good start on how to tie a tourniquet, hands-on training is really the best way to learn. Many organizations offer first aid courses that include tourniquet application. These courses let you practice on training mannequins and get feedback from experienced instructors. David King, MD, a trauma and acute care surgeon at Massachusetts General, has even provided civilian-friendly instructional videos on the proper way to apply a tourniquet. Learning from experts like him makes a huge difference, so.
Consider taking a Stop the Bleed course. These programs are specifically designed to teach everyday people how to control severe bleeding. They cover direct pressure, wound packing, and tourniquet use. You can find more information about these kinds of courses and other emergency preparedness tips on our site by clicking here: . This type of training builds confidence and helps you react effectively in a real crisis, you know.
Knowing how to act in a medical emergency is a valuable skill. It is not just about knowing facts, but about being able to perform under pressure. Regular practice and staying up-to-date with best practices can truly prepare you for the unexpected. You can also find more resources and detailed guides on emergency first aid by visiting this page: . It's a skill that can truly change the outcome of a terrible situation, you know.
Frequently Asked Questions About Tourniquets
People often have questions about using tourniquets. Here are some common ones that come up, you know, when people are trying to learn about this important topic.
Can a tourniquet be applied too tightly?
A tourniquet needs to be applied very tightly to work. The goal is to stop all blood flow. If it's not tight enough, it won't stop the bleeding effectively. It might even make things worse by trapping blood in the limb. So, the right amount of tightness means the bleeding has completely stopped. That, is that, the measure of success.
How long can a tourniquet stay on?
Ideally, a tourniquet should stay on for the shortest time possible. Medical professionals aim to get the person to a hospital within two hours. While some studies suggest it can be safe for longer, the general rule is to get professional help as quickly as you can. It's best not to leave it on longer than necessary, obviously.
What if I don't have a commercial tourniquet?
If you do not have a commercial tourniquet, you can improvise one using common materials. A wide strip of strong cloth, like a scarf or a belt, can serve as the band. A sturdy stick or pen can act as the windlass to tighten it. Remember, an improvised tourniquet is better than doing nothing in a life-threatening bleeding situation. It's a bit like making do with what you have, you know.
Final Thoughts on Emergency Preparedness
Being ready for an emergency means having some basic knowledge and a willingness to act. Learning how to tie a tourniquet is a big part of that readiness. It gives you a way to help when someone is in very serious trouble. Your ability to stay calm and apply this tool can make all the difference, really.
The key takeaway is that severe bleeding needs fast, effective action. Knowing what to do, even just the basics, empowers you. It is a powerful thing to be able to help others in their most desperate moments. Keep learning, keep practicing, and be prepared to be a lifesaver, you know.
For more detailed information on emergency first aid and to find training courses near you, consider checking resources from reputable organizations like the American Red Cross or similar groups. Their guides and classes offer hands-on practice and deeper insights into these critical skills. It's a good way to build confidence and be ready for whatever comes your way, so.
How To Tie A Tourniquet – My Medic

Torniquete TIE (Tourniquet in emergency) 4ª GEN. | SERMILITAR | Reviews

How To Tie A Tourniquet – My Medic
