Your Gentle Guide To Taking Off Acrylic Nails At Home
It's almost like a tiny emergency, isn't it? You look down at your beautiful acrylic nails, and suddenly, you realize they need to come off. Maybe you're stuck in a manicure emergency with absolutely no way to get to a salon in time, or perhaps you just want to save a little money. Whatever the reason, knowing how to take off acrylic nails at home can be a real lifesaver, and it's something many people wonder about, too.
Well, you can take some of our experts’ advice on how to remove acrylic nails at home. This isn't about rushing things or causing harm to your natural nails. Instead, we'll walk you through a method that respects your nail health, so you can feel good about the process and the outcome. It's really about being prepared and taking your time, you know?
Wondering how to remove acrylic nails at home without damage? Forcibly peeling off or biting your acrylic nails can lead to damaged nail beds, infections, and prolonged recovery times. Proper removal ensures not only the appearance but also the health of your natural nails. Try these easy tutorials for DIY removal without going to the salon, according to experts. Read on to discover the easy and safe method, basically.
Table of Contents
- Why Gentle Removal Matters for Your Natural Nails
- Getting Ready: What You'll Need
- Step-by-Step Guide to Taking Off Acrylic Nails Safely
- Expert Advice and Important Tips
- Common Questions About Taking Off Acrylic Nails
Why Gentle Removal Matters for Your Natural Nails
Thinking about how to take off acrylic nails often brings up concerns about keeping your natural nails in good shape. It's actually a very important part of the whole process. Forcibly peeling off or biting your acrylic nails can lead to damaged nail beds, infections, and prolonged recovery times, which is something nobody wants, really. Your natural nails are underneath all that, and they need care, too.
Proper removal ensures not only the appearance but also the health of your natural nails. When you rush or use too much force, you can tear layers of your natural nail away, leaving them weak, thin, and quite vulnerable. This can make them hurt, and it might take a long time for them to get back to feeling strong again. So, patience is a big part of this, you know?
A gentle approach helps keep your nail beds intact and free from harm. It's about protecting what's underneath, making sure your nails can grow out healthy and strong after the acrylics are gone. This way, you can enjoy your natural nails or get another set of acrylics without worry, as a matter of fact. It just makes sense to treat them kindly.
Consider this: your nails are a part of your body, and like any other part, they need respectful treatment. Ignoring proper removal steps could mean dealing with discomfort or even medical issues later on. It's a bit like taking off a bandage too fast; it just hurts, and it can cause more problems than it solves. So, taking your time is really key here, basically.
Many people find that their nails feel much better and look healthier when they've been removed with care. It’s a small effort that pays off in the long run, giving you strong, happy nails. This whole process is designed to support that goal, allowing you to transition from acrylics without any drama, you know? It's all about being smart about it.
Getting Ready: What You'll Need
Before diving into the process of how to take off acrylic nails, it’s essential to gather all necessary supplies. Having everything ready beforehand makes the whole experience much smoother and less stressful. You don't want to be halfway through and realize you're missing something important, that's for sure. A little preparation goes a long way, actually.
Here’s a list of what you'll want to have on hand, so you can do this right:
- Nail Clippers: These help you trim down the length of the acrylics, making them easier to work with. Shorter nails mean less surface area to soak, too.
- Nail File (Coarse and Fine): You'll use the coarse file to gently remove the top layer of the acrylic, breaking the seal. A finer file can be used for shaping later, you know.
- 100% Pure Acetone: This is the most effective way to dissolve acrylic. Make sure it's pure acetone, not just nail polish remover, which is often weaker.
- Cotton Balls or Cotton Pads: These will soak up the acetone and sit on your nails. You'll need enough for each nail, plus a few extra, just in case.
- Aluminum Foil: Cut into squares, these will wrap around your fingers to hold the acetone-soaked cotton in place and keep it from evaporating.
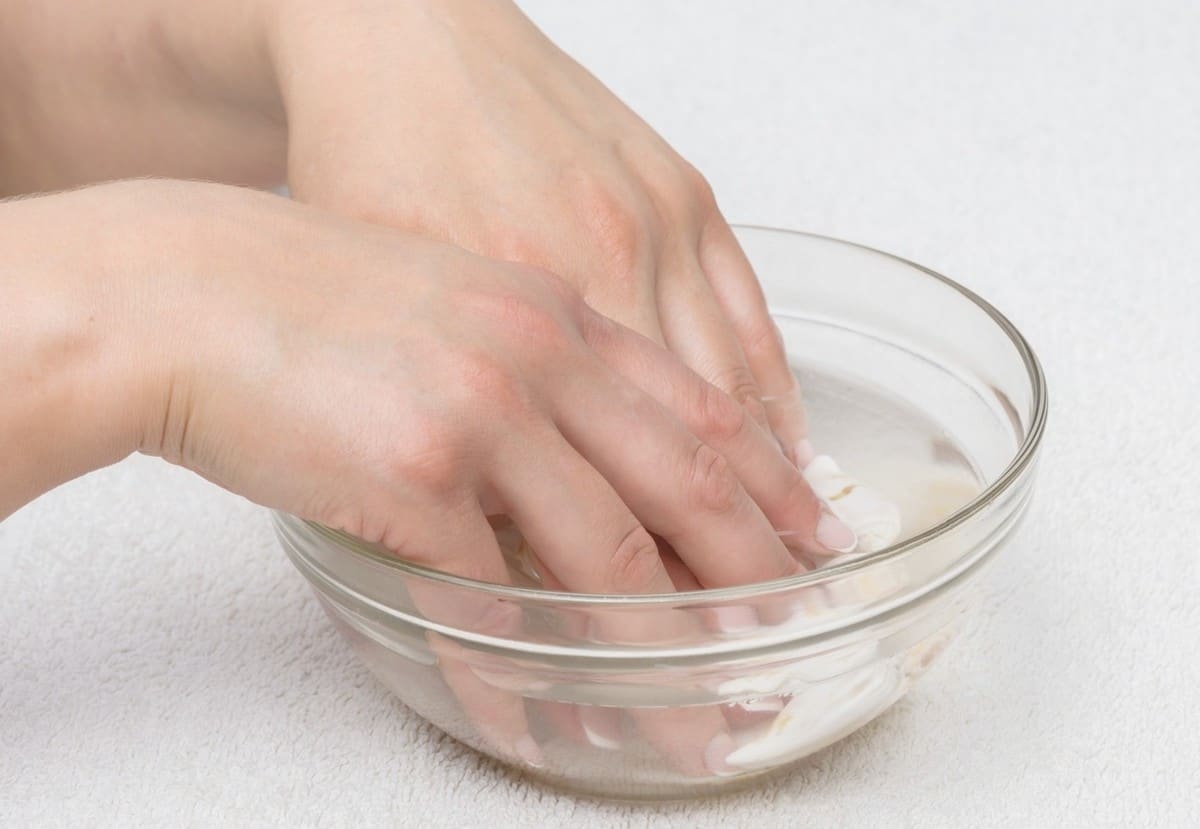
- Small Bowl (Glass or Ceramic): If you prefer to soak your entire hand, a small, non-plastic bowl is good for the acetone. Plastic might react with the acetone, so be careful, you know.
- Orange Wood Stick or Cuticle Pusher: This tool helps gently push off the softened acrylic. It's really useful for getting under the edges.
- Dental Floss: Yes, dental floss! This is for a specific method we'll talk about, but it's good to have it ready, just in case.
- Nail Buffer: For smoothing out your natural nails after the acrylics are off. This helps with any rough spots, basically.
- Cuticle Oil or Rich Hand Cream: Acetone can be very drying, so you'll want something to moisturize your nails and skin afterward. This is a very important step for recovery.
- Towel: To protect your work surface from spills and drips. It's always a good idea to have one nearby, you know.
Having all these items ready before you start will make the process of how to take off acrylic nails much more efficient and less messy. It's like preparing for any project; the right tools make all the difference, really. So, take a moment to gather everything, and then you'll be set to go, pretty much.
Step-by-Step Guide to Taking Off Acrylic Nails Safely
In the spirit of not gatekeeping and passing on the knowledge, here's everything you need to know about how to take off acrylic nails —step by step—straight from the experts. This method is designed to be gentle on your natural nails, minimizing damage and promoting healthy regrowth. It's all about patience and using the right technique, you know?
The Acetone Soak Method
This is arguably the most common and effective way to remove acrylic nails at home. It requires a bit of time, but it’s gentle if done correctly. Ahead, we're sharing exactly how to remove acrylic nails at home with the help of celebrity manicurists Julie Kandalec and Gina Alcedo, who really know their stuff, you know?
Step 1: Trim and File Down the Acrylic. Start by clipping the length of your acrylic nails as short as you can comfortably go. This reduces the amount of material that needs to dissolve. Then, use a coarse nail file to file down the top layer of the acrylic. You want to remove the shiny top coat and some of the bulk, but be careful not to file into your natural nail. This step helps the acetone penetrate more easily, which is quite important, you know.
Step 2: Protect Your Skin. Acetone can be very drying to your skin. Apply a generous amount of petroleum jelly or a thick cream around your cuticles and the skin surrounding your nails. This creates a barrier, protecting your skin from the harsh effects of the acetone, basically. It's a small step that makes a big difference, honestly.
Step 3: Prepare Your Acetone Soaks. Take a cotton ball or a piece of cotton pad and saturate it completely with 100% pure acetone. Make sure it's truly soaked through, as this is what will do the work. You'll need one for each nail, so prepare ten of them, you know.
Step 4: Wrap Each Nail. Place one acetone-soaked cotton ball directly on top of your acrylic nail, making sure it covers the entire surface. Then, take a piece of aluminum foil and wrap it tightly around your finger, securing the cotton ball in place. The foil helps to create a warm environment, which speeds up the dissolving process, and it also keeps the acetone from evaporating too quickly. Do this for all ten fingers, so.
Step 5: Wait and Let Them Soak. Then, wait 30 minutes before gently pulling them off. This waiting period is crucial; it allows the acetone to break down the acrylic completely. You might feel a slight tingling sensation, but it shouldn't be painful. If you experience discomfort, remove the wraps immediately. Patience is very important here, you know.
Step 6: Gently Remove and Scrape. After 30 minutes, remove one foil wrap. The acrylic should look soft and gooey, almost like a gel. Use an orange wood stick or a cuticle pusher to gently push the softened acrylic off your natural nail. It should come off quite easily. If it's still hard or resistant, re-wrap the nail with a fresh acetone-soaked cotton ball and foil, and wait another 10-15 minutes. Do not force it off, as that can damage your natural nail, which is a big no-no, really.
Step 7: Repeat and Refine. Continue this process for each nail. Some nails might need a second soak, especially if they were applied very thickly. Once all the acrylic is off, use a fine nail buffer to gently smooth out any remaining residue or rough spots on your natural nails. Be very gentle during this step, as your natural nails will be a bit soft after the acetone exposure, you know.
The Dental Floss Method: A Gentle Alternative
This method is more about leveraging existing lift than dissolving the entire nail. It's a quick way to get them off if they're already loose, but it's not for everyone, you know. Loosen the base of the nail with a pick, then work a length of dental floss between the acrylic and natural nail until the acrylic nail comes free. This method should only be used if your acrylic nails are already lifting significantly from your natural nail, basically.
Step 1: Create a Small Opening. If your acrylic nail has a tiny lift at the cuticle area, you can gently use an orange wood stick or a pick to create a small opening. Be incredibly careful not to pry or force it, as this can damage your nail bed. You're just looking for a starting point, you know.
Step 2: Introduce the Dental Floss. Take a piece of dental floss, about 18 inches long, and have someone help you with this part if possible. Your helper should hold one end of the floss, and you hold the other. Gently slide the floss into the small opening you created at the base of the nail. This is where it gets a little tricky, honestly.
Step 3: Work the Floss Through. With gentle, back-and-forth sawing motions, work the length of dental floss between the acrylic and your natural nail. Your helper should pull the floss forward towards the tip of your nail, while you guide it. The goal is to slowly separate the acrylic from your natural nail. If you feel any resistance or pain, stop immediately. The acrylic nail should come free with gentle effort. This method is really only for nails that are already quite loose, so.
Step 4: After Removal. Once the acrylic nail comes free, you'll still want to buff your natural nail gently and apply cuticle oil to help with recovery. This method is faster, but it carries a higher risk of damage if not done on already lifted nails, you know. So, proceed with caution, pretty much.
Aftercare for Healthy Nails
Once your acrylics are off, your natural nails will need some serious TLC. They've been covered for a while, and the acetone can leave them feeling dry and a bit weak. This part is just as important as the removal itself for ensuring your nails stay healthy, you know.
1. Moisturize, Moisturize, Moisturize: Immediately after removing the acrylics, wash your hands thoroughly to remove any acetone residue. Then, apply a generous amount of cuticle oil to your cuticles and nails. Massage it in gently. Follow up with a rich hand cream, making sure to rub it into your nails as well. Do this multiple times a day for the next few days or even weeks. Hydration is key to helping your nails recover, basically.
2. Trim and Shape: Your natural nails might be a bit long or uneven after the removal. Gently trim them to a manageable length. Use a fine nail file to shape them. Avoid harsh back-and-forth filing, which can cause splitting. Instead, file in one direction. This helps prevent further damage, honestly.
3. Buff Gently: If there's any slight residue or unevenness on your nail surface, use a gentle nail buffer to smooth it out. Be very light-handed; you're not trying to remove layers of your natural nail, just to refine the surface. This makes them look and feel much better, you know.
4. Give Them a Break: It's a good idea to let your natural nails breathe for a while before applying any new polish or enhancements. This resting period allows them to regain their strength and moisture. Consider it a spa vacation for your nails, you know? Many experts suggest a break of at least a week or two, sometimes even longer.
5. Strengthen Them: You might consider using a nail strengthener or a fortifying base coat if your nails feel particularly weak. These products can provide an extra layer of protection and help promote healthy growth. Look for ones that contain vitamins or proteins, which can be very helpful, you know.
6. Wear Gloves: When doing chores that involve water or harsh chemicals, like washing dishes or cleaning, wear gloves. This protects your recovering nails from further drying out or being exposed to irritants. It's a simple habit that makes a big difference, honestly.
Taking these aftercare steps seriously will greatly improve the health and appearance of your natural nails post-acrylic removal. It's an investment in your nail health, really, and it helps them bounce back quickly, you know.
Expert Advice and Important Tips
When it comes to how to take off acrylic nails, there are some really important things to keep in mind, straight from those who know best. With that in mind, ahead you’ll learn how to (and how not to) remove acrylic nails at home. It's about being smart and gentle, you know?
Although it's always ideal to see a licensed nail tech for the safest removal, it's possible to do it at home as long as the right tools are used and the process is done gently. Celebrity manicurists Julie Kandalec and Gina Alcedo, for instance, emphasize patience and care. They say that rushing is the biggest mistake you can make, which is very true, you know.
Here are some extra pieces of advice to help you out:
- Patience is Your Best Friend: This isn't a race. The acrylic needs time to dissolve properly. If you try to pull or peel it off before it's fully softened, you'll definitely damage your natural nail. Just let the acetone do its job, so.
- Ventilation Matters: Acetone has a strong smell, and it's best to use it in a well-ventilated area. Open a window or work near a fan to keep the air moving. This makes the experience much more pleasant, you know.
- Don't Force Anything: If a piece of acrylic isn't coming off easily, don't yank it. Re-soak it. Forcing it is the quickest way to cause pain and harm to your nail bed. Your nails will thank you for being gentle, honestly.
- Hydrate Your Body, Too: Drinking plenty of water can help keep your nails and skin hydrated from the inside out. This supports overall nail health, especially after exposure to drying agents like acetone. It's a good habit generally, you know.
- Consider Nail Strengtheners: After removal, your nails might feel a bit weak. Using a good nail strengthener for a few weeks can help them regain their strength and resilience. It's like a little boost for them, basically.
- Listen to Your Nails: Pay attention to how your nails feel during and after the process. If you notice any redness, swelling, or unusual pain, it's a good idea to consult a doctor or a nail professional. Sometimes, things need a bit more attention, you know.
In short, knowing how to take off acrylic nails at home is about preparation, patience, and proper aftercare. By following these guidelines, you can remove your acrylics safely and keep your natural nails healthy and strong. Learn more about nail health on our site, and link to this page for more nail care tips. As of October 26, 2023, these methods remain the most reliable for at-home removal, offering a safe path to healthy nails.
Common Questions About Taking Off Acrylic Nails
People often have questions about how to take off acrylic nails, especially when trying it at home for the first time. Here are some common queries and their answers, just to clear things up, you know.
Is it bad to peel off acrylic nails?
Yes, it's actually very bad to peel off acrylic nails. Forcibly peeling them off can rip layers of your natural nail plate away, leaving your nails thin, weak, and very prone to breakage. This can cause significant pain and make your nails vulnerable to infections. It's really best to avoid this at all costs, honestly.
How long does it take to remove acrylic nails at home?
The acetone soak method typically takes about 30 minutes of soaking time, plus preparation and aftercare. So, you're looking at roughly 45 minutes to an hour for the whole process, depending on how many soaks each nail needs. Patience is key here, so rushing will only make it longer or cause damage, you know.
What household items can I use to remove acrylic nails?
The most effective household item for dissolving acrylic nails is 100% pure acetone. While some people might try rubbing alcohol or hand sanitizer, these are not strong enough to properly break down acrylic and can lead to frustration and potential damage from trying to force the nails off. For the best results, stick with pure acetone and aluminum foil, which are pretty common household items, you know.

How to Take Off Acrylic Nails At Home — At-Home Acrylic Manicure
How to Take Off Acrylic Nails with Hot Water: the Truth Exposed! - nailhow
How To Take Off Acrylic Nails With Only Hot Water Easily - DIY
