Gel For Finger Waves: Your Guide To Lasting, Lovely Styles
Achieving those beautiful, flowing finger waves, the kind that just seem to glide across your head, is that something you've been dreaming of? It's a look that truly captures a timeless elegance, a classic style that keeps coming back. For anyone wanting to create these smooth, sculpted patterns in their hair, the right product makes all the difference, and that's where a good gel for finger waves steps in. This isn't just any hair product; it's the very foundation for those intricate, polished designs.
You see, getting those perfect, defined ridges and valleys isn't just about technique, though that plays a big part. It's also very much about the substance you choose to help your hair hold its shape. A quality gel provides the necessary grip and control, allowing you to mold your strands into those signature S-shaped patterns. It helps the waves stay put, too, keeping them from falling flat or losing their lovely form as the day goes on. So, picking out the right gel is, in a way, like choosing the perfect clay for a sculptor.
Today, we're going to explore what makes a gel ideal for finger waves, how to pick one that suits your hair, and some helpful ways to use it. We'll look at why this particular styling aid is so crucial for creating a look that’s both stunning and durable. It’s about giving you the insights you need to get those waves just right, making sure they look fantastic and truly last.
Table of Contents
- What Are Finger Waves and Why Gel Is Key?
- The Science Behind Gel for Hair Styling
- Choosing the Right Gel for Your Finger Waves
- Applying Gel for Flawless Finger Waves
- Tips for Lasting Hold and Shine
- Common Challenges and How to Fix Them
- Modern Takes on Classic Finger Waves
- Frequently Asked Questions About Gel for Finger Waves
- Final Thoughts on Your Finger Wave Journey
What Are Finger Waves and Why Gel Is Key?
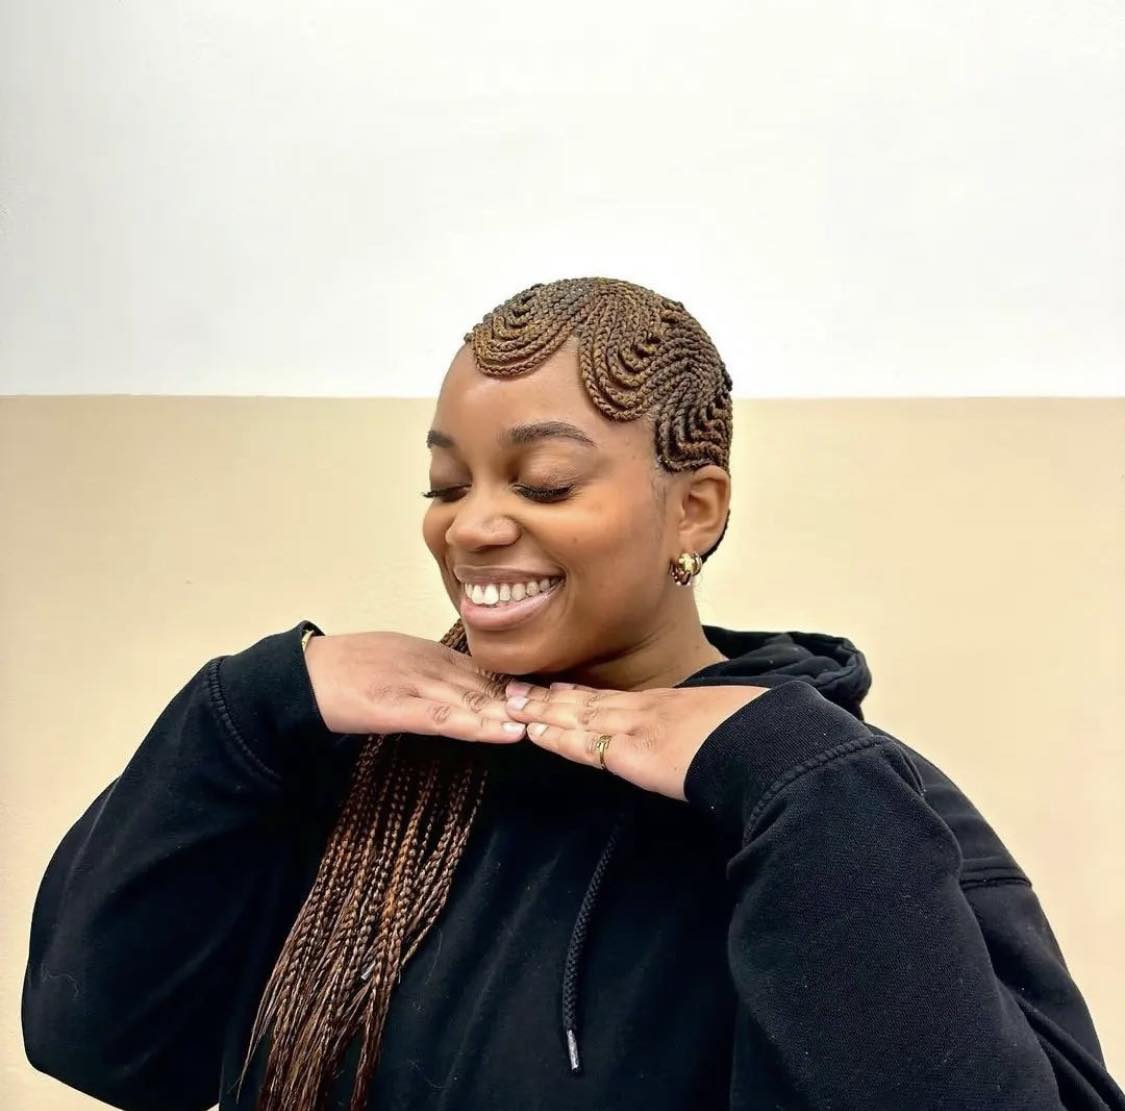
Finger waves are a classic hairstyle that became very popular in the 1920s and 1930s. They involve creating a series of S-shaped ridges and valleys in the hair, usually close to the scalp, which then cascade down. This style offers a very smooth, glossy appearance, and it's quite distinct from curls or typical waves. You create these patterns by using your fingers and a comb to mold wet hair, and then you let it dry in that exact shape. So, that's where the "finger" part of the name actually comes from.
Now, why is gel so incredibly important for this particular look? Well, finger waves need something that can really hold the hair firmly in place as it dries. Without a strong setting agent, the hair would just spring back to its natural state, and all your careful work would be lost. Gel provides that essential, almost rigid, structure, ensuring the waves keep their sculpted form for a long time. It’s almost like building a tiny, intricate sculpture on your head, and the gel is the mortar that holds it all together.
It's also about achieving that signature sleekness and shine. A good gel for finger waves helps to smooth down any flyaways and adds a lovely luster to the hair, which is a hallmark of this vintage style. This means your finished look isn't just held in place; it also looks incredibly polished and elegant. So, it really plays a double role in making those waves truly shine.
The Science Behind Gel for Hair Styling
To truly understand why gel works so well for finger waves, it helps to know a little bit about what gel actually is. My text describes gel as a "coherent mass consisting of a liquid in which particles too small to be seen in an ordinary optical microscope are either dispersed or arranged in a fine network throughout the mass." In simpler terms, it's a substance that feels like a jelly or a thick liquid, but it has a solid-like structure because tiny bits of liquid are spread out within a more solid base. This is what gives it that unique texture, not quite liquid and not quite solid, which is perfect for hair styling.
When you apply gel to your hair, it coats each strand. As the water in the gel evaporates, the polymers—which are long chains of molecules—form a film around the hair. This film then dries and becomes somewhat rigid, holding the hair in whatever shape you've molded it into. It’s very much like a clear, flexible cast that keeps your waves locked in place. The definition from my text, "gels are a dispersion of molecules of a liquid within a solid medium," really speaks to this property, allowing it to solidify and provide that strong hold.
Different types of gel have different amounts and kinds of these polymers, which affects how strong the hold is and how the hair feels once it’s dry. Some gels might create a very firm, almost crunchy feel, while others offer a more flexible hold. The goal for finger waves is usually a firm hold that still allows for a bit of movement and shine, without too much stiffness. So, the composition of the gel is quite important for the final outcome, you know?
Choosing the Right Gel for Your Finger Waves
Picking the perfect gel for finger waves is a crucial step in getting the look you want. It's not a one-size-fits-all situation, as different hair types and desired outcomes call for different kinds of products. You need to consider how much hold you need, what ingredients are in the gel, and how your hair typically behaves. This selection process is, in a way, like finding the right tool for a very specific job.
Hold Levels Explained
Gels come with various hold levels, usually described as light, medium, strong, or extra-strong. For finger waves, you'll generally want something with a medium to strong hold. A light hold gel simply won't provide enough grip to keep those intricate S-shapes from unraveling. It’s just not robust enough, you know?
A strong hold gel, however, will really lock your waves into place, making them last for hours. The downside can be a feeling of stiffness or a "crunchy" texture if too much is used or if the gel isn't formulated well. So, it's a balance. Some gels offer a "flexible hold" which means they set firmly but still allow for a bit of natural movement, which is quite nice for a softer finger wave look. You really want to aim for something that provides excellent control without making your hair feel like a helmet.
Ingredients to Look For and Avoid
When you're looking at the ingredients list, there are a few things to keep in mind. For good hold, you'll often see polymers like PVP (polyvinylpyrrolidone) or VP/VA Copolymer. These are the elements that create that setting film on your hair. Ingredients that add moisture, like glycerin or panthenol, can also be beneficial, as they help keep the hair from drying out too much and becoming brittle. This is pretty important for maintaining hair health, too.
On the other hand, some gels contain a lot of alcohol, which can be very drying to the hair, especially if you use them often. This can lead to flakiness or a dull appearance over time. Also, some gels might contain silicones that can build up on the hair, making it feel heavy or greasy. So, it's a good idea to check the label for these things. You might also want to avoid gels with too many artificial fragrances or dyes if you have a sensitive scalp, as a matter of fact.
Considering Your Hair Type
Your hair type plays a significant role in which gel will work best. For fine or thin hair, a lighter, yet still strong-holding, gel might be better to avoid weighing it down. You want definition without the bulk. For thicker or coarser hair, a heavier, extra-strong hold gel might be necessary to really get those waves to set and stay put. It needs more power to control it, so.
If you have curly or natural hair, look for gels that are specifically designed to work with your texture, perhaps those that offer frizz control and extra moisture. These gels often provide excellent slip, which makes it easier to comb through and create the waves without snagging. So, it’s really about matching the product to your unique hair's needs, you know?
Applying Gel for Flawless Finger Waves
Once you have your chosen gel, the way you apply it is just as important as the product itself. Proper application ensures that the gel works effectively to create those crisp, lasting waves. It’s a process that requires a little patience and precision, but the results are truly worth the effort, honestly.
Preparation is Everything
Before you even think about applying gel, your hair needs to be properly prepared. Finger waves are typically done on wet or very damp hair. This allows the hair strands to be more pliable and easier to mold into the desired shapes. You should start with freshly washed and conditioned hair, gently towel-dried so it's damp but not dripping. This ensures an even application and better absorption of the gel.
You might also want to detangle your hair thoroughly before starting. Any knots or tangles will make it difficult to create smooth, consistent waves. A wide-tooth comb is usually best for this. Some people even like to apply a leave-in conditioner first, especially if their hair tends to be dry, just to give it a little extra moisture. So, getting your hair ready is really the first big step.
Step-by-Step Application
Now for the gel itself. Start by dispensing a small amount of gel into your palm, perhaps about a dime-sized dollop. You can always add more if you need it, but it’s harder to take away excess. Rub your hands together to spread the gel evenly. Then, apply it section by section to your hair, making sure to coat the strands from root to tip. You want even coverage, but not so much that your hair is saturated or gloopy. It’s a fine line, you know?
As you apply, use a fine-tooth comb to distribute the gel and begin to create your waves. Starting from the hairline, push the hair forward with your comb, then use your finger to hold that ridge in place while you comb the next section backward. This creates that signature S-shape. Repeat this motion, working your way down the section of hair. It takes a little practice to get the rhythm right, but you'll get the hang of it, you know?
Drying and Setting Your Waves
Once you’ve sculpted your waves, the drying process is critical for setting them. The best way to dry finger waves is to let them air dry naturally. This allows the gel to set slowly and firmly, creating a lasting hold without frizz. If you're in a hurry, you can use a hooded dryer on a low, cool setting. Avoid using a blow dryer with a nozzle, as the direct airflow can disturb the waves and cause frizz. You really want to keep that gentle setting.
While drying, try not to touch your hair too much. Any disturbance can break the delicate set of the waves. Once your hair is completely dry and feels firm, you can gently break up any stiffness by lightly running your fingers through the waves or using a soft brush. This softens the look while keeping the shape intact. Some people even apply a light hairspray for extra hold, but usually, a good gel for finger waves is enough, honestly.
Tips for Lasting Hold and Shine
Getting those finger waves to stay perfect all day, or even longer, is the goal. Beyond choosing the right gel and applying it well, there are a few extra tricks that can really help your style last and keep that lovely shine. These little details can make a big difference in the overall success of your look, you know?
First, consider the amount of gel you use. Too little, and your waves won't hold; too much, and your hair might feel heavy or flake. It's a bit of a balancing act, and you might need to experiment a little to find the sweet spot for your hair type. A good starting point is a small amount, then add more if needed, rather than starting with a lot, so.
For added shine, look for gels that specifically mention "shine" or "gloss" on their labels. Some gels contain ingredients like argan oil or shea butter, which can add a beautiful luster without making your hair greasy. After your waves are fully dry, a light mist of shine spray can also boost the glossiness. Just be careful not to use too much, as it can weigh down your waves. It's all about that subtle gleam.
To help your waves last overnight, consider sleeping with a silk or satin scarf or bonnet. This helps to reduce friction, which can cause frizz and flatten your waves. It also protects your hair from moisture in the air, which can make the gel lose its hold. This simple step can really extend the life of your beautiful finger waves, you know? You can learn more about hair care techniques on our site.
Common Challenges and How to Fix Them
Even with the best gel for finger waves, you might run into a few common issues. Don't worry, these are usually easy to fix once you know what's going on. It’s just part of the learning process, really.
One frequent problem is flaking. This usually happens when too much gel is used, or if the gel isn't compatible with other products in your hair, or if it's an alcohol-heavy formula. To avoid this, try using less product, ensuring your hair is truly clean before applying, and opting for an alcohol-free gel. If you notice flaking, sometimes a gentle brush-through can help, but prevention is usually the best approach, you know?
Another common complaint is hair feeling too crunchy or stiff. This is often a sign of using a gel with too strong a hold for your hair type, or again, using too much product. To soften the feel without losing the wave, once your hair is completely dry, gently "scrunch" or lightly massage the waves with your hands. You can also apply a tiny bit of hair oil to your palms and lightly smooth it over the waves. This can break up the stiffness while maintaining the shape, so.
If your waves aren't holding their shape, it could be that your hair wasn't wet enough when you applied the gel, or the gel's hold isn't strong enough for your hair texture. Make sure your hair is consistently damp, not just slightly moist. You might also need to switch to a gel with a firmer hold. It’s all about finding that right balance for your unique hair, you know?
Modern Takes on Classic Finger Waves
While finger waves have a strong vintage appeal, they're not just for period looks. Many people are giving them a fresh, contemporary twist today. This shows how versatile the style really is, and how a good gel for finger waves can adapt to different aesthetics. It’s pretty cool, actually, how old styles can feel new again.
For example, instead of doing full head-to-head waves, some people are incorporating finger waves into just one section of their hair, like around the hairline or as a side accent. This creates a subtle nod to the classic style without going full retro. It’s a very chic way to add some flair to an otherwise simple hairstyle. You might see this with updos or even with loose, flowing hair, just adding a touch of sculpted elegance near the face, so.
Another modern approach involves playing with texture. While traditional finger waves are super smooth, some contemporary versions might pair the waves with more voluminous or textured hair elsewhere. Or, they might use a gel that offers a more flexible hold, resulting in softer, less rigid waves that still have that distinct S-shape. This creates a look that feels both classic and current, you know? You can also find inspiration for other looks by checking out this page .
Color also plays a role. Finger waves on vibrant, fashion colors can look incredibly striking and edgy, completely transforming the vintage feel into something very modern. It's about taking the technique and applying it in unexpected ways, making it your own. So, don't feel limited to just the traditional interpretation; experiment and have fun with it!
Frequently Asked Questions About Gel for Finger Waves
Here are some common questions people often ask about using gel for finger waves:
What kind of gel do you use for finger waves?
You generally want a gel with a medium to strong hold. Look for products specifically labeled for "setting" or "sculpting" hair. Gels that offer good shine and don't flake are also ideal. Some popular types include styling gels, waving lotions, or even certain pomades that have a gel-like consistency. It's really about finding one that provides firm control, you know?
How do you make finger waves last?
To make finger waves last, proper application of a strong-hold gel is key. Ensure your hair is thoroughly saturated with gel and completely dry before disturbing the waves. Using a hooded dryer can help set them firmly. Protecting your hair overnight with a silk scarf or bonnet will also significantly extend the life of your style, so.
Can you do finger waves on short hair?
Absolutely! Finger waves are actually a fantastic style for short hair, especially bobs or pixie cuts. The shorter length often makes it easier to create those defined ridges close to the scalp. Many classic finger wave looks were originally done on shorter hair, so it's a very natural fit for those lengths, actually.
Final Thoughts on Your Finger Wave Journey
Creating beautiful finger waves is a truly rewarding experience, and the right gel for finger waves is your most important ally in this process. From understanding what gel actually is—a dispersion of liquid within a solid medium that helps hair hold its shape, as my text describes—to mastering the application, every step contributes to that polished, elegant result. It's about more than just a product; it's about the precision and care you put into your style.
Remember, practice really does make perfect with finger waves. Don't get discouraged if your first few attempts aren't exactly what you envisioned. Keep experimenting with different gels, varying amounts, and slightly different techniques. You'll soon discover what works best for your hair, and you'll be sculpting those stunning waves with confidence. It's a skill that, once learned, opens up a world of classic and contemporary styling possibilities, you know?

TONI&GUY Education on Instagram: "Sculpted finger waves created by
12 Finger Waves Hairstyles That Will Add A Touch Of Vintage Glam To
Gel Finger Inserts | Accessories | Sharp Edges
