How To Make A Tourniquet In An Emergency: A Guide For Life-Saving Moments
Knowing how to make a tourniquet could, quite literally, save a life when every second counts. Bleeding that won't stop, like from a very bad cut or a serious injury, can be truly scary. When someone is losing a lot of blood quickly, and direct pressure isn't doing enough, a tourniquet becomes a tool of last resort. It's about stopping that blood flow to keep someone alive until medical help can get there. This information is for extreme situations, like what you might face today, May 15, 2024, if a sudden, terrible accident happens.
You see, in these kinds of urgent moments, there often isn't a proper medical kit around. That's when you might need to improvise, to create something out of what you have nearby. This guide will walk you through the steps to put together a makeshift tourniquet. It's something you hope you never need, but it's good to have this knowledge, just in case. It's about being ready for the unexpected, and that, you know, can bring a bit of peace of mind.
It's very important to say upfront that the text you provided, "My text," talks about things like software tools (CMake, Make), journal submission statuses, and technical troubleshooting for programs like Fluent. It does not contain any information about medical procedures or how to make a tourniquet. Therefore, this guide will draw upon general, widely accepted first aid principles for emergency bleeding control. We are not using your provided text for any medical instructions, as it simply isn't about that topic, which is pretty clear.
Table of Contents
- When You Might Need to Make One
- What You Will Need for an Improvised Tourniquet
- Step-by-Step: How to Make a Tourniquet
- Important Things to Remember
- Frequently Asked Questions
When You Might Need to Make One
You know, there are very specific times when making a tourniquet could be a necessary action. This is for situations where someone has a truly severe bleed, a type of bleeding that seems to gush or spurt out, and it just won't stop, even if you put a lot of direct pressure on it. That, you see, is the key. If direct pressure with a clean cloth or your hand isn't working, or if the injury is too big or in a spot where you can't apply pressure, then a tourniquet comes into the picture. It's often used for injuries to arms or legs, especially when a limb might be crushed or partly torn off. So, it's really for those life-threatening bleeds that need immediate, drastic action, almost like a last chance before professional help arrives.
What You Will Need for an Improvised Tourniquet
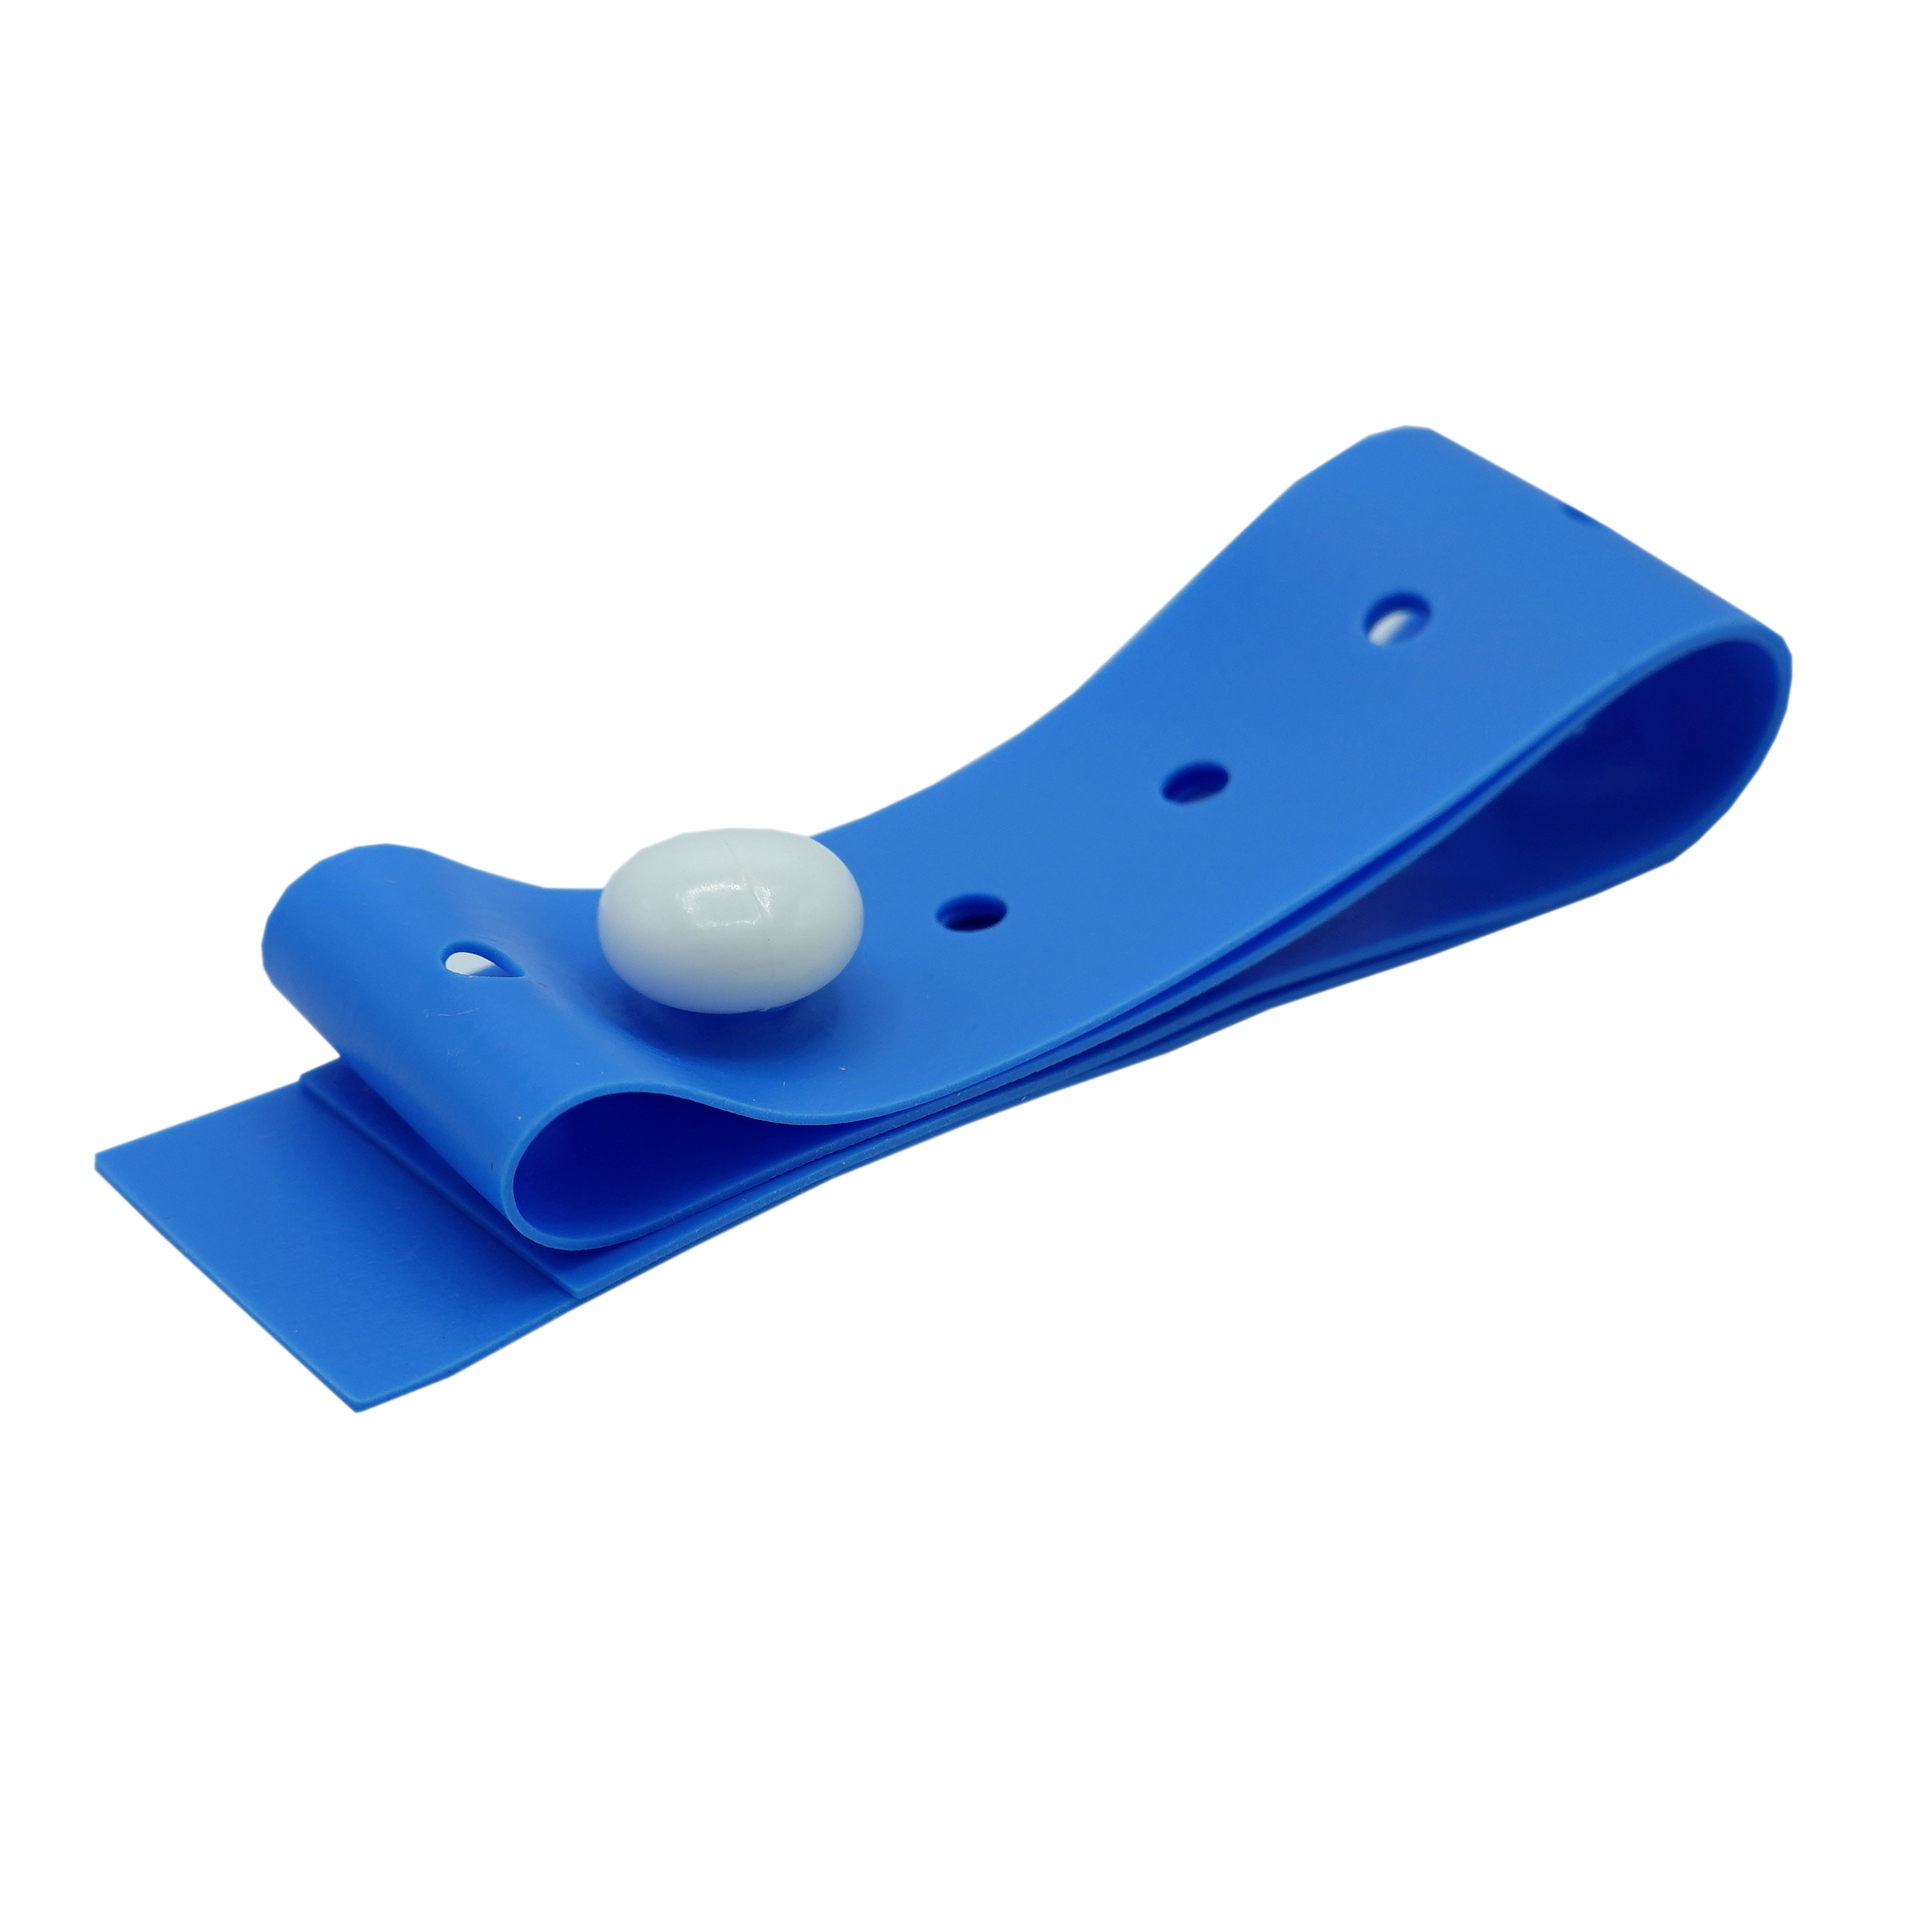
To make a makeshift tourniquet, you'll need a few basic things. It's about finding items that can do the job of a real medical tourniquet, which, you know, has special parts. You'll need something to go around the limb, something to twist and tighten it, and then something to keep that twisting piece in place. So, let's look at what each part does and what common items might work. It's pretty simple when you break it down.
The Band
This is the part that wraps around the injured limb. It needs to be wide enough, say about one to two inches across, so it doesn't cut into the skin too much. A narrow rope or string is not a good idea because it can cause more damage. You want something that can apply even pressure. Good choices could be a scarf, a piece of clothing like a shirt or a bandanna, a belt, or even a strong piece of fabric torn from something else. The idea is to have a broad surface that can really compress the blood vessels underneath. It needs to be long enough to go around the limb and tie a knot, too, it's almost a given.
The Windlass
The windlass is the stick-like object you'll use to twist the band and make it tight. This is what helps you get enough pressure to stop the blood flow. It needs to be sturdy, something that won't break when you twist it hard. A strong stick, a pen, a small wrench, a screwdriver, or even a sturdy piece of pipe could work. You want something that you can hold onto firmly and twist, and that won't snap under pressure. It should be long enough to give you good leverage, too, you know, for twisting.
The Securing Method
Once you twist the windlass to tighten the tourniquet, you need a way to keep it from unwinding. This is very important, because if it unwinds, the blood will start flowing again. You could use another piece of cloth, tape, or even a shoelace to tie the windlass in place. Some people might even use the ends of the band itself if they are long enough. The goal is to make sure that the windlass stays put and keeps the pressure on. It's really about making sure all your hard work doesn't just, you know, come undone.
Step-by-Step: How to Make a Tourniquet
Making a tourniquet is a series of clear steps. Remember, this is for a true emergency, where life is on the line. Take a deep breath, and just focus on each part. It's not something you want to rush through carelessly, but it does need to be done quickly. So, let's go through it, one bit at a time, to make sure you get the idea.
Step 1: Find Your Materials
First things first, you need to gather the items we just talked about. Look around for a suitable band, like a shirt or a scarf. Then, find your windlass, maybe a stick or a pen. And finally, get something to secure it, perhaps another strip of cloth or tape. The quicker you can get these things, the better. You know, every second counts when someone is bleeding badly. So, be quick but also be thoughtful about what you pick.
Step 2: Place the Band
Now, you take your chosen band and place it high up on the injured limb, about two to three inches above the wound, if you can. It needs to be on the limb, not on a joint like the elbow or knee. Putting it over a joint won't work as well to stop the blood flow. You want to make sure it's on the fleshy part of the arm or leg. Wrap it around the limb and tie a simple half-knot. Make it as tight as you can with your hands, even before you add the windlass. This initial tightness is pretty important, you know, to get things started right.
Step 3: Tie a Half-Knot
After you've wrapped the band around, make a simple half-knot. This is like the first step of tying your shoelaces. Just cross one end over the other and pull it through. Don't make a full knot yet. You need to leave a bit of slack for the windlass. This knot just holds the band in place for a moment, so it doesn't slip while you get ready for the next part. It's a quick, simple tie, that's all, just to keep things from moving around too much.
Step 4: Insert the Windlass
Now, take your windlass, that stick or pen you found. Place it right on top of that half-knot you just made. It should lie across the knot. This is where the magic happens, so to speak. This object will be what you twist to make the tourniquet really effective. Make sure it's sitting firmly on the knot, ready for the next move. It needs to be positioned well, you know, to get the best leverage for tightening.
Step 5: Twist to Tighten
With the windlass in place, twist it. Turn it round and round, like turning a screw, until the bleeding stops completely. This might take a few turns. You will see the band get tighter and tighter. Keep twisting until the blood flow from the wound stops. This can be painful for the injured person, but stopping the blood is the main goal here. It's a very direct action, and you'll see the effect pretty much right away, if it's working.
Step 6: Secure the Windlass
Once the bleeding has stopped, you need to keep the windlass from unwinding. This is super important. You can tie the ends of the band over the windlass to hold it down. Or, if you have another piece of cloth or tape, wrap it around the windlass and the limb to keep it from spinning back. Make sure it's really secure. If it loosens, the bleeding will start again. So, make it firm, very firm, so it won't move. It's like locking it into place, you know, for safety.
Step 7: Note the Time
This step is often forgotten, but it's very important for medical professionals later on. Write down the time you put the tourniquet on. You can write it on the person's forehead with a marker, if you have one, or on a piece of paper that you stick to them. Knowing how long the tourniquet has been in place helps doctors make better decisions about care. It's a small thing, but it helps a lot, you know, for the people who will take over.
Important Things to Remember
Using a tourniquet, even a makeshift one, is a serious matter. It can save a life, but it also carries risks. This is why it's always a last resort for very severe, uncontrolled bleeding. Never use a tourniquet unless the bleeding is truly life-threatening and other methods, like direct pressure, have failed. Once you put a tourniquet on, do not take it off. Only trained medical personnel should remove it. Removing it too soon can cause a sudden rush of blood back into the limb, which can be very dangerous. It's a one-way street once it's on, you know, until help arrives.
Always call for emergency medical help immediately after applying a tourniquet. Get someone to call 911 or your local emergency number right away. Stay with the injured person and keep them as calm and comfortable as possible until help gets there. You can learn more about general first aid and emergency care principles from reputable sources, like the American Red Cross. Learning these skills can make a big difference, you know, in a real crisis.
It's also worth saying that practice makes perfect, even for things you hope you never use. If you have the chance, take a proper first aid course. They teach you how to use real tourniquets and how to handle all sorts of emergencies. This guide is for when you're caught off guard and have to make do with what's around. But formal training, you see, is always the best way to be truly prepared. It gives you the confidence, that's what it does, to act when it matters most.
For more information on emergency preparedness, you can learn more about first aid basics on our site, and link to this page for more specific details on stopping severe blood loss.
Frequently Asked Questions
Here are some common questions people often ask about tourniquets, especially when thinking about how to make a tourniquet in a pinch.
Can a tourniquet cause more harm than good?
Yes, it can, if it's not used correctly or when it's not truly needed. A tourniquet cuts off blood flow, and that means the tissues below it don't get oxygen. This can cause damage, sometimes very serious damage, to the limb. That's why it's only for situations where the person might bleed to death otherwise. It's a trade-off, you know, saving a life versus risking a limb.
How long can a tourniquet stay on?
Generally, a tourniquet should stay on for as short a time as possible. Medical experts say that keeping it on for up to two hours is usually okay, but after that, the risk of serious damage goes up quite a bit. The goal is to get the person to professional medical care quickly, so doctors can take over. You should never remove it yourself, once it's on, that's really important to remember.
What if I don't have a windlass?
If you can't find a sturdy stick or similar object for a windlass, you might not be able to get enough pressure to stop the bleeding completely. In such a case, you would still apply the band as tightly as you can and try to maintain direct pressure on the wound while waiting for help. A windlass is pretty much key for effective blood stoppage with a makeshift tourniquet. It's very hard to get enough tightness without one, you know, just by hand.
Disposable Tourniquet

How To Make A Homemade Tourniquet

Tourniquet Cuff Selection | Tourniquets.org
