Canning Pickled Onions: A Simple Way To Brighten Any Meal
Bringing the bright, tangy taste of pickled onions to your kitchen all year long is truly simpler than you might imagine. As a matter of fact, canning pickled onions is easier than you think, and they are a staple for salads, burgers, and a whole bunch of other dishes! This wonderful method of food preservation lets you keep those crisp, flavorful rings ready for whenever a meal needs a little lift. So, if you've been curious about making your own pantry staples, this is a fantastic place to start, arguably.
Pickled red onions add a vibrant pop of color and a delightful bite of acidity to any meal, truly. Have you got some storage onions starting to sprout or go soft, or perhaps you found a really great deal on some at the grocery store? You definitely need to try pickling them! This pickled red onion recipe is simple, safe, and it brightens up any meal, you know. Pickled sliced onions are versatile and just plain perfect in every way, so it's almost a shame not to have them on hand.
Learning how to preserve pickled onions with this easy canning recipe will change how you think about pantry stocking. However, know that canning is a great way to preserve pickled onions, since, as you can see, it dramatically extends their shelf life. Canning is a versatile and safe method to preserve your garden’s harvest, prepare for unexpected power outages, reduce reliance on the grocery store, and have a variety of delicious items ready. I am Sharon Peterson at Simply Canning, and you’ll find tested canning recipes, practical tutorials, and preservation techniques for a healthy, homemade pantry there, too.
Table of Contents
- Why Can Pickled Onions?
- What You Will Need
- Preparing Your Onions
- Crafting the Brine
- The Canning Process: Step-by-Step
- Safety First in Canning
- Enjoying Your Homemade Pickled Onions
- Frequently Asked Questions
Why Can Pickled Onions?
Canning pickled onions is a very smart move for anyone who enjoys fresh flavors and wants to be prepared. For one thing, it lets you enjoy the crispness and tang of these onions long after their growing season, or when you find them at a great price. Canning is a rewarding way to preserve food and enjoy peak flavors all year long, you know. It’s a method to preserve food in jars at high temperatures for a long period of time, killing microorganisms and inactivates enzymes that could cause food to spoil, so it's quite reliable.
Beyond extending shelf life, having canned pickled onions means you have a ready-to-use ingredient for countless meals. They are easy to eat right out of the jar, or as a condiment on top of salads, pasta, burgers, and more, as a matter of fact. Canning also helps reduce food waste, especially if you have an abundance of onions from your garden or a bulk purchase. It’s a practice that was once a literal lifesaver in the days before refrigeration, which shows its long-standing value, perhaps.
What You Will Need
To start your canning adventure, you’ll need a few specific items. Having the right tools makes the process smoother and safer, basically. You don't need a lot of fancy equipment, just the essentials that help you get the job done right. We're going for an old-fashioned type of canning here, with only a few basic ingredients, you see.
Essential Equipment
You will need canning jars, usually pint or half-pint sizes are good for pickled onions. Make sure they are designed for canning, with no chips or cracks. You'll also need new two-piece canning lids and rings. A water bath canner is important; this is a large pot with a rack that holds jars off the bottom and allows water to cover them completely. You'll also want a jar lifter, a canning funnel, and a non-metallic spatula or chopstick for removing air bubbles, you know. A kitchen timer and clean towels are also quite useful, too.
Basic Ingredients
For the pickled onions themselves, the main star is, of course, onions! Red onions are a great choice for their vibrant color, as "My text" points out. You will not find red pepper flakes, or any other funky spices in this recipe, just plain and simple and perfect in every way. When canning pickled red onions, make a pickling brine with vinegar, water, pickling salt, and spices, as a matter of fact. Use white vinegar with 5% acidity, and pickling salt (not iodized table salt, which can cloud the brine). For spices, whole spices like mustard seeds, dill seeds, or a bay leaf are good choices, but you can keep it very simple if you like.
Preparing Your Onions
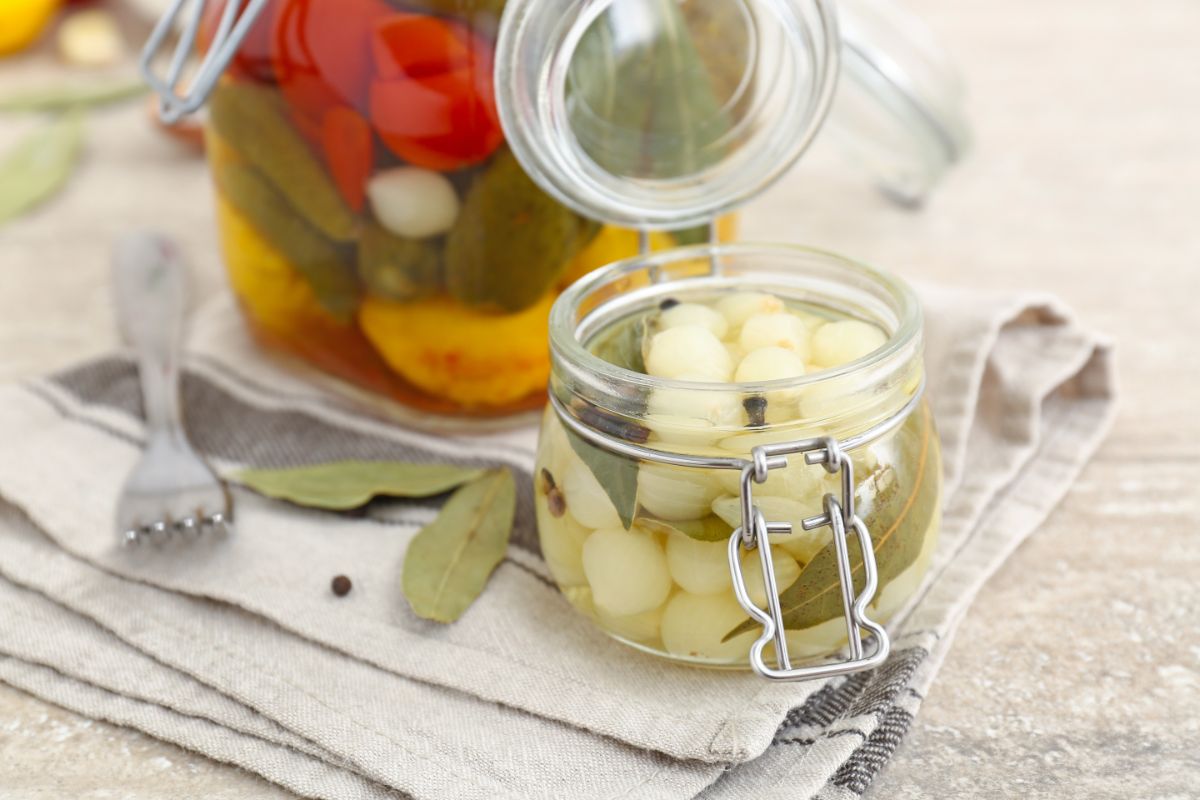
Getting your onions ready is the first step towards those delicious jars. Start by peeling your onions. For larger onions, you might want to slice them into rings or half-moons, about 1/4 inch thick. Smaller pearl onions can be left whole, but they might need a bit more time to absorb the brine, perhaps. You want consistent sizes so they pickle evenly, you know. This step is pretty straightforward, just make sure your work area is clean, basically.
After slicing, some people like to soak their onions in ice water for a bit. This can help them stay crisp after pickling, actually. It’s not strictly necessary for safety, but it does help with texture. If you do this, drain them very well before moving on to the next step. You want the onions to be as dry as possible before they meet the hot brine, as a matter of fact.
Crafting the Brine
The pickling brine is what gives your onions their tangy flavor and helps preserve them. This part is simple, just follow the recipe carefully. The ratio of vinegar to water is important for safety, as the acidity prevents spoilage. A common ratio for pickled onions is often equal parts vinegar and water, or slightly more vinegar, you see. For example, you might use two cups of white vinegar to two cups of water.
In a non-reactive pot, combine your vinegar, water, and pickling salt. If you are using whole spices, add them to the brine now. Bring this mixture to a boil, stirring until the salt has dissolved completely. Let it simmer for a few minutes to let the flavors blend, basically. This hot brine is what you'll pour over your onions in the jars, so keep it warm until you're ready, you know.
The Canning Process: Step-by-Step
Now comes the heart of canning: putting it all together safely. Canning is an important, safe method of food preservation if practiced properly. The canning process involves placing foods in jars and heating them to a temperature that destroys unwanted elements, you see. Processing destroys microorganisms and creates the desired vacuum for a good seal, so it's a very precise operation, arguably.
Prepare Jars and Lids
Wash your canning jars and lids in hot, soapy water. Rinse them well. Keep the jars hot until you are ready to fill them; you can do this by placing them in your water bath canner filled with hot water, or in a warm oven. This prevents thermal shock when you add hot brine, actually. Lids should be prepared according to the manufacturer's directions, often by simmering them in warm water, but never boiling them, you know.
Blanch the Onions
Add onions to the brine and boil for 5 minutes, as "My text" advises. This step, often called blanching, helps to soften the onions slightly and makes them more pliable for packing into jars. It also helps them release some of their natural moisture, allowing them to absorb the pickling brine better. After the 5 minutes, carefully remove the onions from the hot brine using a slotted spoon, you know. Keep the brine hot, as you will need it shortly, basically.
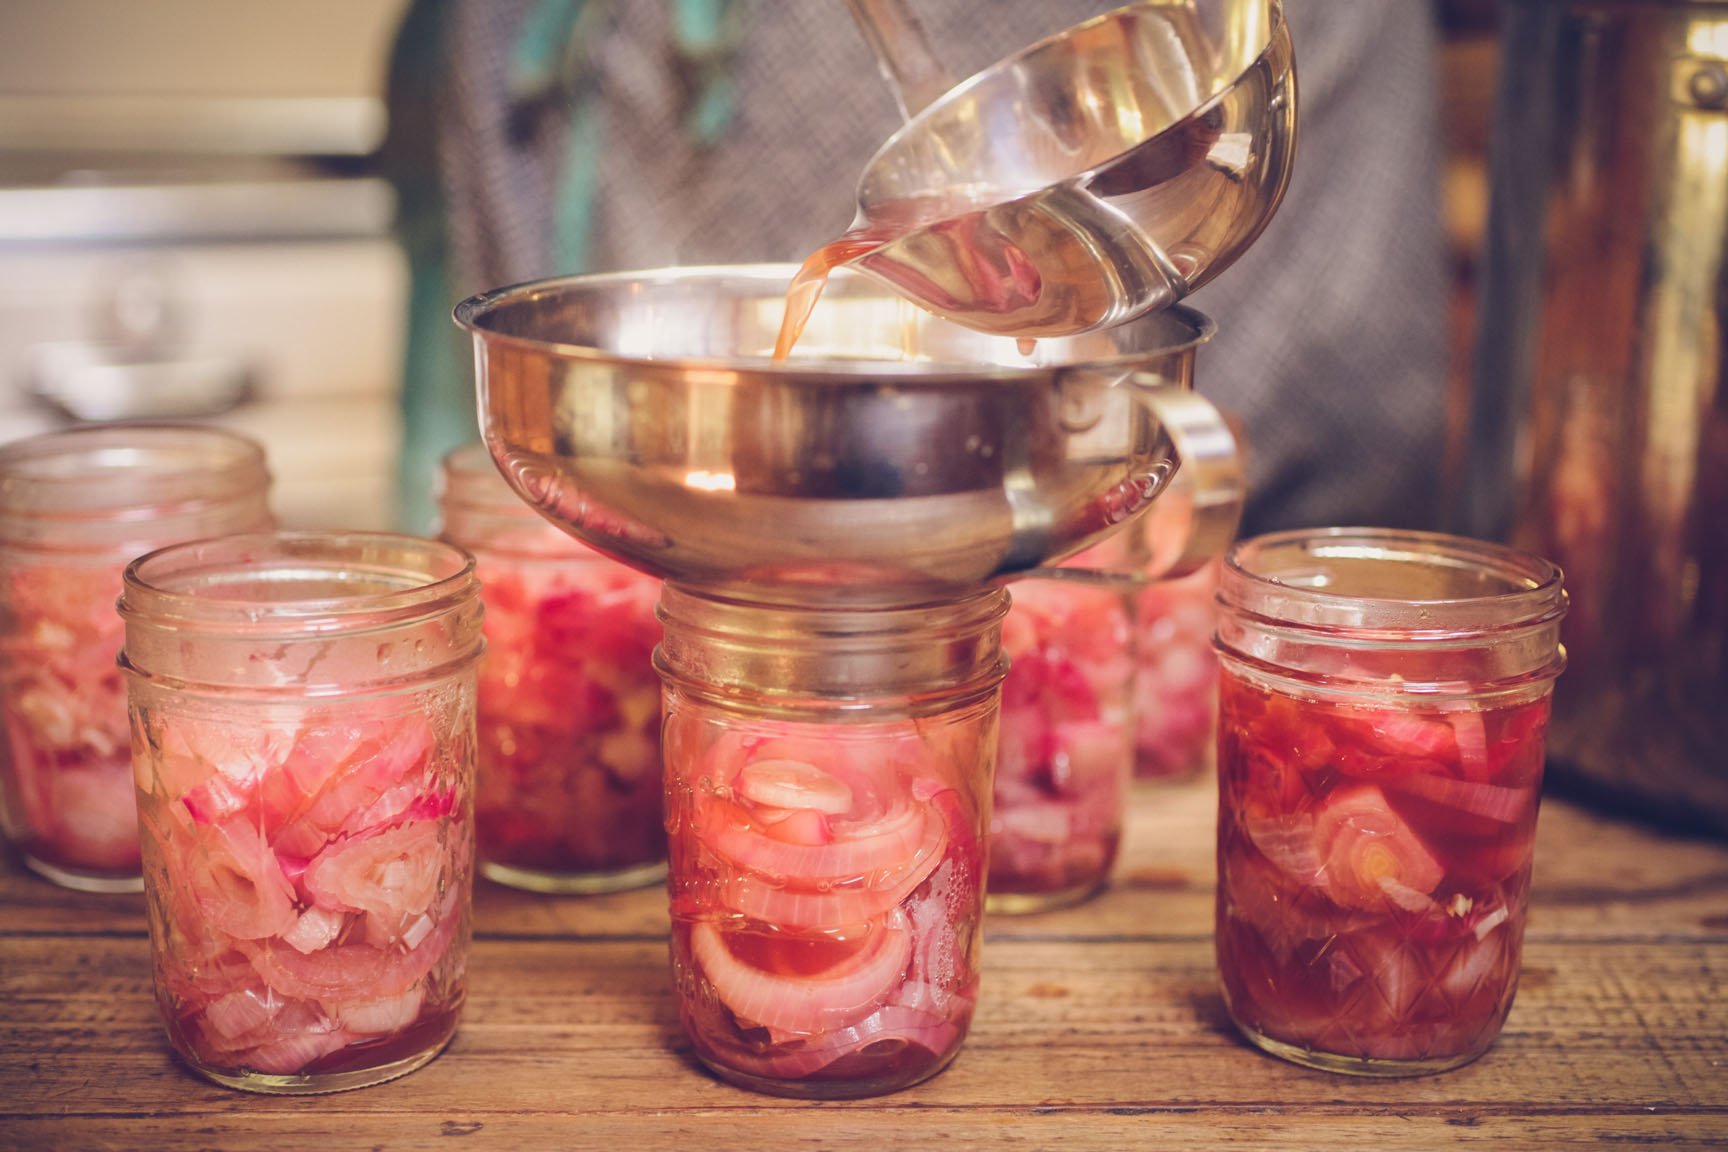
Fill the Jars
Using a canning funnel, carefully ladle the onions into hot canning jars. Pack them snugly but not too tightly, leaving about a half-inch of headspace from the top of the jar. Headspace is the empty space between the food and the lid, and it's quite important for a proper seal, you see. Make sure the onions are evenly distributed in each jar, perhaps, for consistent pickling.
Remove Air Bubbles
Once the onions are in the jars, pour the hot pickling brine over them, making sure to cover all the onions. Again, leave a half-inch of headspace. Use a non-metallic utensil, like a plastic chopstick or a slender spatula, to gently remove any air bubbles trapped among the onions. Run the utensil along the inside of the jar, pressing gently to release bubbles. This step is important for a good seal and proper preservation, you know.
Wipe Rims and Seal
After removing air bubbles, wipe the rims of each jar with a clean, damp cloth. Any food residue on the rim can prevent a proper seal, so this step is very important, basically. Place a prepared lid on each jar, centering it. Then, screw on the metal band until it is fingertip tight. This means tight enough to hold the lid in place, but not so tight that air can't escape during processing, you know.
Process in a Water Bath
Carefully place the filled jars onto the rack in your water bath canner. Make sure the jars are not touching each other or the sides of the canner. Add enough hot water to the canner so that the tops of the jars are covered by at least one inch of water. Bring the water to a rolling boil. Once it reaches a full boil, start your timer for the recommended processing time for pickled onions, which is typically 10-15 minutes for pint jars, adjusting for your altitude, of course. For accurate altitude adjustments, you might want to check a reliable source like the National Center for Home Food Preservation, arguably.
Cool and Check Seals
Once the processing time is up, turn off the heat and let the jars sit in the hot water for 5 minutes. This helps prevent siphoning and helps ensure a good seal, you know. Carefully remove the jars from the canner using a jar lifter and place them on a towel-lined surface, leaving space between them for air circulation. Let them cool undisturbed for 12 to 24 hours. As they cool, you should hear a "pop" sound as the lids seal, basically. After cooling, check the seals: the center of the lid should be concave and not flex when pressed. If a lid doesn't seal, refrigerate that jar and use its contents within a few weeks, you know.
Safety First in Canning
Canning is an important, safe method of food preservation if practiced properly. It is absolutely vital to follow tested recipes and guidelines to ensure the safety of your canned goods. Always use a current, reliable canning recipe, especially for acidic foods like pickled onions. Never alter the vinegar-to-water ratio in pickling recipes, as this can compromise the acidity and safety. Using proper equipment and ensuring jars are clean and lids are new also plays a big part in preventing spoilage, you know. Learn how to can food safely with tips, tools, and safety guidelines, perhaps by exploring resources on our site, like . It's a skill that pays off, honestly.
Enjoying Your Homemade Pickled Onions
Once your jars of pickled onions are sealed and cooled, store them in a cool, dark place. They will be ready to enjoy after a few weeks, which allows the flavors to fully develop. These homemade pickled onions are incredibly versatile. You can add them to tacos, sandwiches, salads, or even just eat them straight from the jar, they are that good. They add a bright, tangy kick that store-bought versions often lack, you know. To discover more ways to use your canned goods, you might also find inspiration on this page , for instance.
Frequently Asked Questions
People often have questions about canning, especially when trying a new recipe like pickled onions. Here are some common things folks wonder about, basically.
Can I use any type of vinegar for canning pickled onions?
You really should use white vinegar that has at least 5% acidity for canning pickled onions. This specific acidity level is crucial for safety, as it helps prevent the growth of harmful bacteria. Other types of vinegar, like apple cider vinegar, might work for quick pickles kept in the fridge, but for shelf-stable canning, the 5% white vinegar is what's recommended, you know. It's important to stick to the tested recipes for safety, too.
How long do canned pickled onions last?
Properly canned pickled onions, stored in a cool, dark place, can last for up to one year, or even longer, maintaining good quality. While they might be safe to eat beyond that, their flavor and texture might start to decline after about a year, you see. Always check the seal before opening a jar, and if anything looks or smells off, it's best to discard it, just to be safe, perhaps.
Do I need a pressure canner for pickled onions?
No, you do not need a pressure canner for pickled onions. Pickled onions are a high-acid food, thanks to the vinegar, so they can be safely processed using a boiling water bath canner. Pressure canners are typically reserved for low-acid foods like vegetables, meats, and soups, which require much higher temperatures to be safe for shelf storage, you know. For pickled onions, a simple water bath is all you need, basically.
Pickled Red Onions – SBCanning.com – homemade canning recipes

Easy & Versatile Pickled Spring Onions Canning Recipe
Pressure Canning Caramelized Onions and Recipes
