Uncover Your Inner Artist: Mastering Skeleton Drawing On Your Hand
Have you ever looked at your hand and wondered about the amazing structure underneath? Maybe you've thought about how cool it would be to see the bones that give it shape. Well, you're in for a treat! Learning how to do a skeleton drawing on your hand is a really fun, temporary way to explore anatomy and show off your creative side. It's a popular thing to do, especially as of this month, April 2024, when people are always looking for unique artistic expressions.
This kind of body art, you know, it's pretty engaging. It lets you connect with your own body in a fresh, visual way. Plus, it's a fantastic conversation starter, and it's something you can easily wash off when you're done. It's truly a simple, yet striking, artistic endeavor that anyone can try, regardless of their drawing skill level, actually.
So, if you're curious about how your hand moves, or if you just want to create a cool, temporary piece of art, this guide is for you. We'll walk through everything you need to know to make a fantastic skeleton drawing on your hand. It's a bit like learning about the framework of your body, but in a totally hands-on way, literally.
Table of Contents
- Why Draw Skeletons on Your Hand?
- Getting Ready: What You Need
- Understanding the Hand's Framework
- Step-by-Step: Creating Your Hand Skeleton
- Tips for a Great Look
- Different Styles and Ideas
- Caring for Your Hand Art
- Frequently Asked Questions (FAQs)
- Conclusion
Why Draw Skeletons on Your Hand?
There are many reasons why people love to do a skeleton drawing on your hand. For some, it's a creative outlet, a chance to sketch something unique without needing a canvas or paper. It's almost like a living art piece, you know, that moves with you. This kind of temporary art is pretty popular for parties, costumes, or just for a bit of fun at home.
For others, it's a way to learn about the human body. As a matter of fact, seeing the bones drawn directly onto your own hand can make the anatomy lessons stick better. It gives you a real feel for where things are located. It's a very hands-on approach to learning about the framework that supports us, which is pretty neat.
And then, some people just think it looks cool. It's a bit edgy, a bit spooky, and definitely eye-catching. It's a way to express a certain style or mood for a short time. Plus, it's something you can do pretty quickly, so it's good for when you want a quick artistic project, too.
Getting Ready: What You Need
Before you start your skeleton drawing on your hand, gathering your materials is a good idea. You don't need much, which is part of what makes this project so simple and accessible. You probably have most of these things around your house, anyway.
First off, you'll want some skin-safe markers. Think about using cosmetic pencils, eyeliner, or even washable markers that are specifically made for skin. You definitely want to avoid anything permanent or anything that might irritate your skin. Black is a good color for the bones, but you could also use white for highlights or a bit of grey for shading, you know, to give it more depth.
Next, it's helpful to have a reference image of a hand skeleton. You can easily find these online. Having a picture nearby will help you get the bone shapes and positions right. A mirror can also be handy if you're drawing on your dominant hand, so you can see what you're doing more clearly. So, just a few simple items, and you're ready to get started.
Understanding the Hand's Framework
To make your skeleton drawing on your hand look convincing, having a basic idea of what's beneath your skin is really helpful. The human skeleton, as my text says, is the internal framework for the human body. It's what gives us shape and allows us to move. Your hand, in particular, has a pretty intricate setup of bones, cartilage, and ligaments. It's a marvel of diverse tissues and complex structures working together, actually.
The skeletal system, which includes over 200 bones, cartilage, and ligaments, provides support and protection for soft tissues. It also gives attachment points for muscles, which is how we move. For your hand, understanding these parts will make your drawing much more accurate and interesting. It's not just a bunch of random lines, you know; there's a specific design there.
Bones of the Hand
Your hand is pretty amazing, with a lot of small bones that work together. It's a bit more complex than you might first think. The skeleton, in its simplest terms, is the framework that provides structure and facilitates movement. In your hand, you have three main groups of bones that make up this framework, and it's pretty important to know them for your drawing.
Phalanges (Finger Bones): These are the bones that make up your fingers and thumb. Each finger has three phalanges (proximal, middle, and distal), except for your thumb, which has only two. These are the easiest to feel and see the outline of on your hand. They're like little segments, you know, that let your fingers bend and curl.
Metacarpals (Palm Bones): These are the five long bones in the palm of your hand, connecting your finger bones to your wrist bones. You can feel them running down from your knuckles. They give your palm its length and structure. They're sort of the bridge between your fingers and your wrist, so to speak.
Carpals (Wrist Bones): These are eight small, irregularly shaped bones that make up your wrist. They're arranged in two rows and allow for a lot of flexibility in your wrist movement. These are a bit harder to draw individually on your hand, but it's good to know they're there, forming the base of your hand structure. They're kind of like a collection of little pebbles, if you will, that fit together perfectly.
Understanding these bone groups will really help you place your lines correctly when you're doing your skeleton drawing on your hand. It's about getting the proportions right, you know, so it looks believable.
Joints and Movement
Beyond just the bones, it's helpful to think about where they connect. These connection points are called joints, and they're what allow your hand to move in so many ways. The human skeleton, my text reminds us, facilitates movement. Your finger joints are pretty obvious; you can see and feel them bend. When you're drawing, these are the spots where the bones meet and pivot, so it's important to mark them.
The knuckles are the most prominent joints you'll be drawing. These are where your phalanges meet each other and where the metacarpals meet the phalanges. Thinking about how your hand bends and flexes will help you visualize where the bones should be drawn, and how they connect. It's almost like drawing a hinge, you know, at each bend.
Remember, the skeleton acts as a scaffold, providing support. So, when you draw the bones, think about them as the rigid parts, and the joints as the flexible points that connect them. This approach will make your skeleton drawing on your hand look more dynamic and real, too.
The Skeleton's Bigger Picture
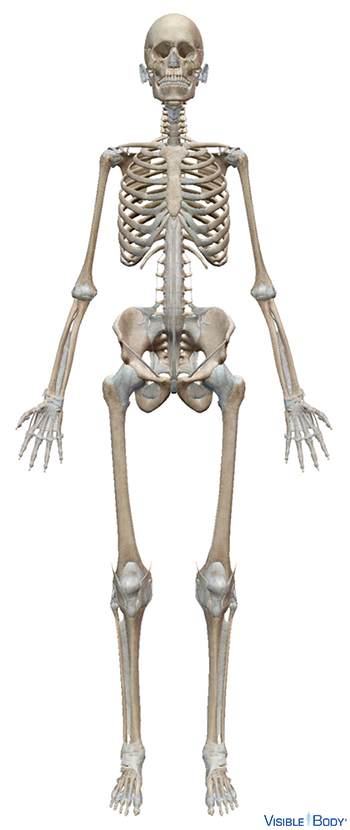
While we're focusing on the hand, it's cool to remember that it's part of a much larger system. The human skeleton is the internal framework for the human body, as my text says. It's a very complex system. In the simplest terms, your skeletal system is your body's most important support. It gives your body its shape and holds your organs in place, you know, keeping everything where it should be.
The skeletal system is divided into two main regions: the axial skeleton and the appendicular skeleton. The axial skeleton forms the central axis of the body and protects critical organs, like your skull, rib cage, and vertebral column. Your hand, along with your arms and legs, belongs to the appendicular skeleton. This part of the skeleton is all about movement and interaction with the world around you, which is pretty amazing.
Skeletons are living systems, made up of cartilage and minerals. They have different layers like the periosteum, compact bone, spongy bone, and bone marrow. Even though you're just drawing on the surface of your hand, knowing that it's part of this incredibly complex and living system adds a lot to the experience. It's more than just lines; it's a representation of something truly vital. An adult's skeleton, for example, contains 206 bones, which is a lot of pieces working together.
Step-by-Step: Creating Your Hand Skeleton
Now for the fun part: actually making your skeleton drawing on your hand! This process is pretty straightforward, and you can adjust it based on how detailed you want to get. Just take your time, and remember it's all about having fun with it. You can always wash it off and try again, too.
Outline Your Hand
First, you'll want to get the basic shape down. Place your hand flat on a surface, palm down, or hold it up so you can see it clearly. Use your marker to lightly draw the outline of your hand. You don't need to press hard; this is just a guide. This step helps you define the space you'll be working in, so you know where your bones will fit. It's sort of like setting the stage for your art, you know.
You can even draw a very faint outline of your fingers and thumb. This initial outline will help you keep your skeleton drawing on your hand proportional to your actual hand. It's a simple start, but it makes a big difference in the final look, honestly.
Mark Key Points
Next, identify the key points on your hand where the bones meet or end. These are your knuckles and the base of your fingers and palm. You can feel these bumps and ridges with your other hand. Use small dots or light lines to mark these spots. For instance, mark the joints where your fingers bend, and the base of your palm where your wrist begins.
These marks will act as anchors for your bone drawings. They ensure that your bones are placed realistically and align with your actual hand structure. It's almost like drawing a map before you draw the roads, you know. This step is pretty important for accuracy.
Drawing the Bones
Now, start drawing the bones themselves. Begin with the phalanges, the bones in your fingers. Draw two lines for each bone, connecting your marked joint points. Remember, your thumb has two bones, and your other fingers have three. Make sure to leave small gaps at the joints to represent where the bones meet, but don't fuse. This gives the impression of separate bones, actually.
Once the fingers are done, move to the metacarpals, the bones in your palm. Draw five long bones extending from the base of each finger down towards your wrist. These will be longer and a bit wider than your finger bones. Then, lightly sketch in the carpal bones at your wrist. These are a bit trickier, as they are smaller and more numerous, so you can just suggest their presence with a few curved lines, if you like.
Take your time with this part. You can always refine your lines as you go. The goal is to create a sense of the skeletal structure, so don't worry about perfect anatomical accuracy unless that's your specific goal. It's your skeleton drawing on your hand, so make it look cool to you.
Adding Details
To make your skeleton drawing on your hand really pop, you can add some details. This is where you can bring in some personality. Think about adding a bit of shading along the edges of the bones to give them a rounded, three-dimensional look. You can do this by lightly cross-hatching or smudging the marker a little. It's a simple trick, but it makes a big difference, you know.
You might also add some small cracks or imperfections to the bones to make them look older or more textured. A few dark spots in the joint areas can also create a sense of depth. If you have a white marker, you could add small highlights to make the bones seem to stand out even more. It's all about making it look a bit more realistic, or at least more artistic, really.
Tips for a Great Look
Getting a great skeleton drawing on your hand isn't just about drawing the lines; it's about making it look effective. Here are some pointers to help your temporary body art really stand out. These little things can make a big difference, you know, in how it's perceived.
Use Light Pressure First: Start with very light lines. This way, if you make a mistake, it's easy to correct or blend away. You can always go over the lines later to make them darker and more defined. It's like sketching before you commit, which is a pretty smart way to work.
Observe Your Own Hand: Bend your fingers, clench your fist, and spread your hand. See how the skin stretches and wrinkles over your bones and joints. This observation can help you place your drawn bones more accurately, especially around the knuckles. It's your hand, so you have the best model right there, actually.
Keep it Simple: You don't need to draw every single tiny bone or ligament. A simplified, stylized skeleton can look just as effective, if not more so, than an overly detailed one. Sometimes less is more, particularly for something temporary like this. It's about capturing the essence, you know, of the skeleton.
Practice Makes Perfect: Don't get discouraged if your first attempt isn't exactly what you envisioned. This is a skill that gets better with practice. Try drawing on paper first, or even on a friend's hand, to get a feel for it. You'll improve with each try, which is pretty common for any artistic pursuit.
Consider Lighting: If you're going to show off your skeleton drawing on your hand, think about how light will hit it. Shading can create illusions of depth, making your bones appear to pop out. This is a bit more advanced, but it's something to consider for a really striking look, too.
Different Styles and Ideas
The beauty of a skeleton drawing on your hand is how versatile it can be. You're not stuck with just one way of doing it. You can adapt the style to fit your mood or the occasion. It's a pretty open canvas, you know, right there on your skin.
Simple Outline: For a quick and easy look, just draw the basic outlines of the bones. This is great for beginners or when you want a subtle effect. It's clean and gets the point across without a lot of fuss. This style is actually pretty popular for a casual look.
Spooky and Realistic: If you're going for a more intense vibe, perhaps for Halloween, focus on adding more shading, cracks, and maybe even a bit of red around the joints to suggest a more gruesome look. This takes a bit more time but can be very impactful. It's about creating a certain atmosphere, too.
Artistic and Abstract: You don't have to be perfectly anatomically correct. You can exaggerate certain features, add swirling lines, or incorporate other design elements. Make it your own unique piece of art. It's your hand, so why not make it truly yours? This approach allows for a lot of creative freedom, you know.
Glow-in-the-Dark: If you can find skin-safe glow-in-the-dark markers, this would be an amazing effect for a night out or a party. Imagine your skeleton hand glowing in the dark! That would be pretty cool, honestly.
Minimalist Dots: Instead of drawing full bones, you could use a series of dots to represent the joints and the general path of the bones. This is a very subtle and modern take on the skeleton drawing on your hand. It's a simple, yet effective, way to suggest the structure.
Think about what you want to convey with your art. Is it fun, spooky, educational, or just cool? This will help you choose the right style for your skeleton drawing on your hand. It's a pretty personal choice, after all.
Caring for Your Hand Art
Since your skeleton drawing on your hand is temporary, caring for it is pretty straightforward. Most skin-safe markers will last for several hours, maybe even a day, depending on how much you wash your hands or rub them. It's not meant to be a permanent fixture, you know, which is part of its charm.
To make it last longer, try to avoid excessive hand washing, especially with soap directly on the drawing. If you need to wash your hands, try to just rinse the palms or use hand sanitizer carefully. You might also want to avoid rubbing your hands together too much, as that can smudge or erase your artwork pretty quickly.
When you're ready to remove your skeleton drawing on your hand, warm water and soap will usually do the trick. A gentle scrub with a washcloth should take it right off. If there's any stubborn residue, a little bit of rubbing alcohol or makeup remover can help. Just be gentle with your skin. It's a simple cleanup, really, which is nice.
Frequently Asked Questions (FAQs)
People often have questions about doing a skeleton drawing on your hand. Here are some common ones:
Q: What kind of markers are safe to use on skin for a skeleton drawing on your hand?
A: You should only use markers specifically labeled as skin-safe, like cosmetic pencils, eyeliner, or washable markers designed for body art. Avoid permanent markers or art markers not intended for skin, as they can cause irritation or be difficult to remove. It's pretty important to choose wisely, you know, for your skin's sake.
Q: How long does a skeleton drawing on your hand usually last?
A: Most temporary skin drawings, like a skeleton drawing on your hand, will last for a few hours up to a day. It really depends on how much you move your hand, wash it, or rub against things. They are designed to be temporary, so don't expect them to stay on for days. It's a short-term artistic expression, actually.
Q: Can I make my skeleton drawing on my hand look more realistic?
A: Absolutely! To make your skeleton drawing on your hand more realistic, focus on understanding the actual bone structure and how light and shadow play on a three-dimensional object. Use shading, highlights, and consider the perspective of your hand. Looking at detailed anatomical charts can really help you get those details right. You can learn more about human anatomy on our site, which is pretty helpful, too.
Conclusion
Creating a skeleton drawing on your hand is a really fun and expressive way to connect with your own body's amazing structure. It's a temporary piece of art that allows you to explore creativity, learn a bit of anatomy, and just have a good time. From understanding the individual bones like the phalanges and metacarpals, which are part of the larger skeletal system, to adding those cool details, it's a rewarding project. The human skeleton, as we've discussed, is a marvel, providing structure and allowing movement, and drawing it on your hand is a unique way to appreciate that. So, why not give it a try today? You might just discover a new artistic passion! You can also check out other creative body art ideas on our about us page, which is pretty neat.
Glossar des Skelettsystems

What is a Skeleton? | Skeleton Museum

Human Skeleton Back
